|
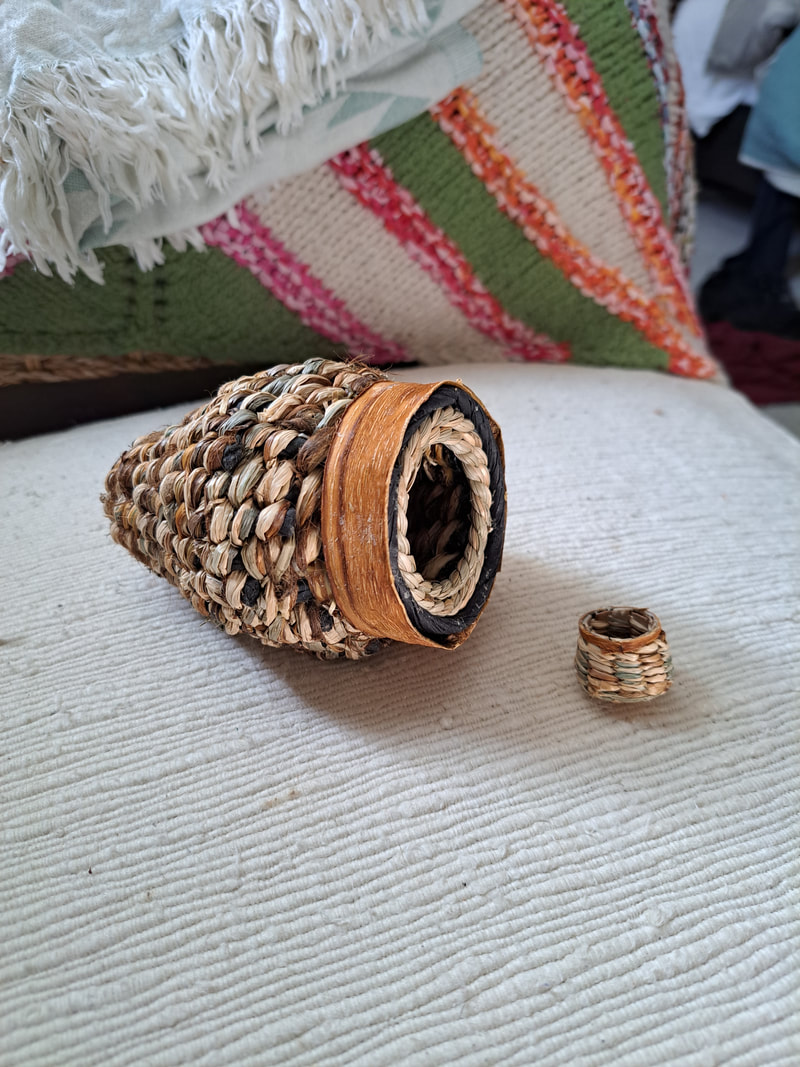
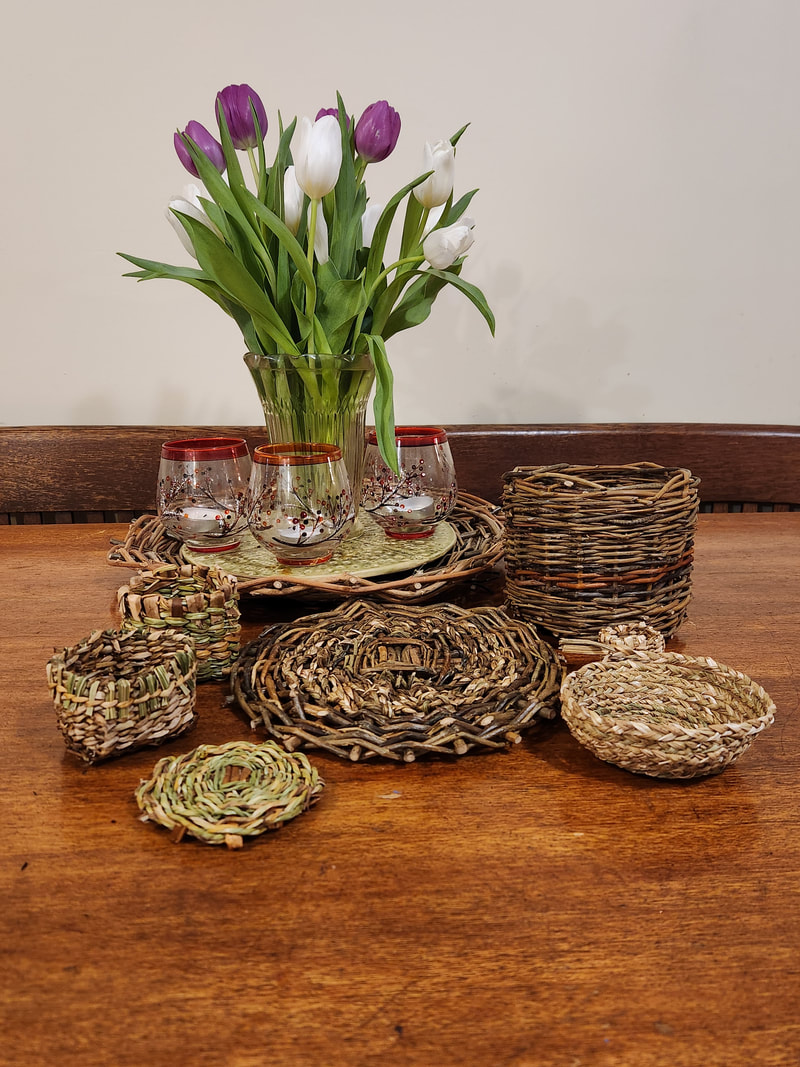
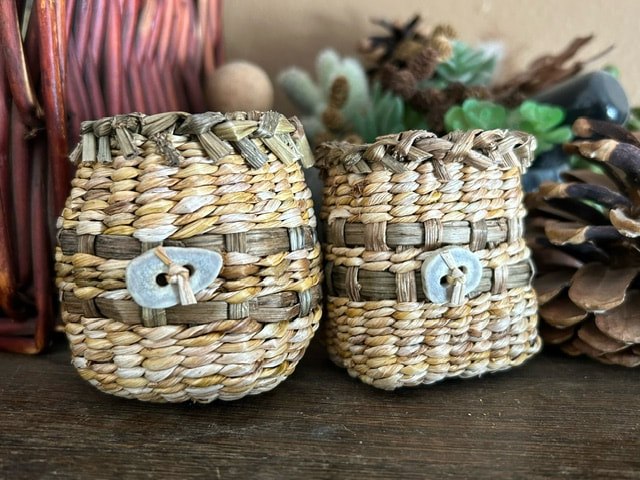
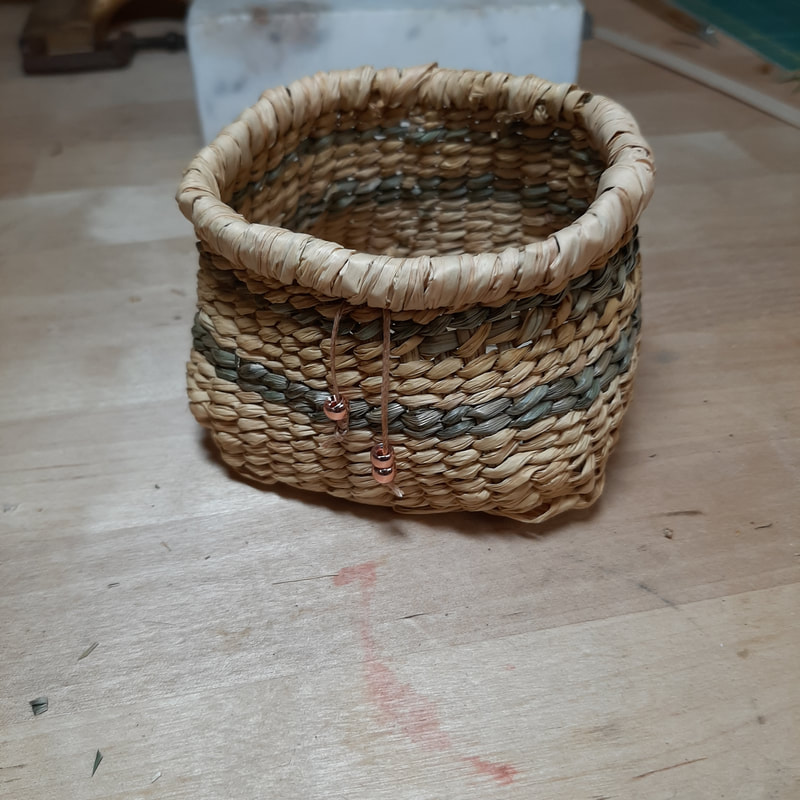
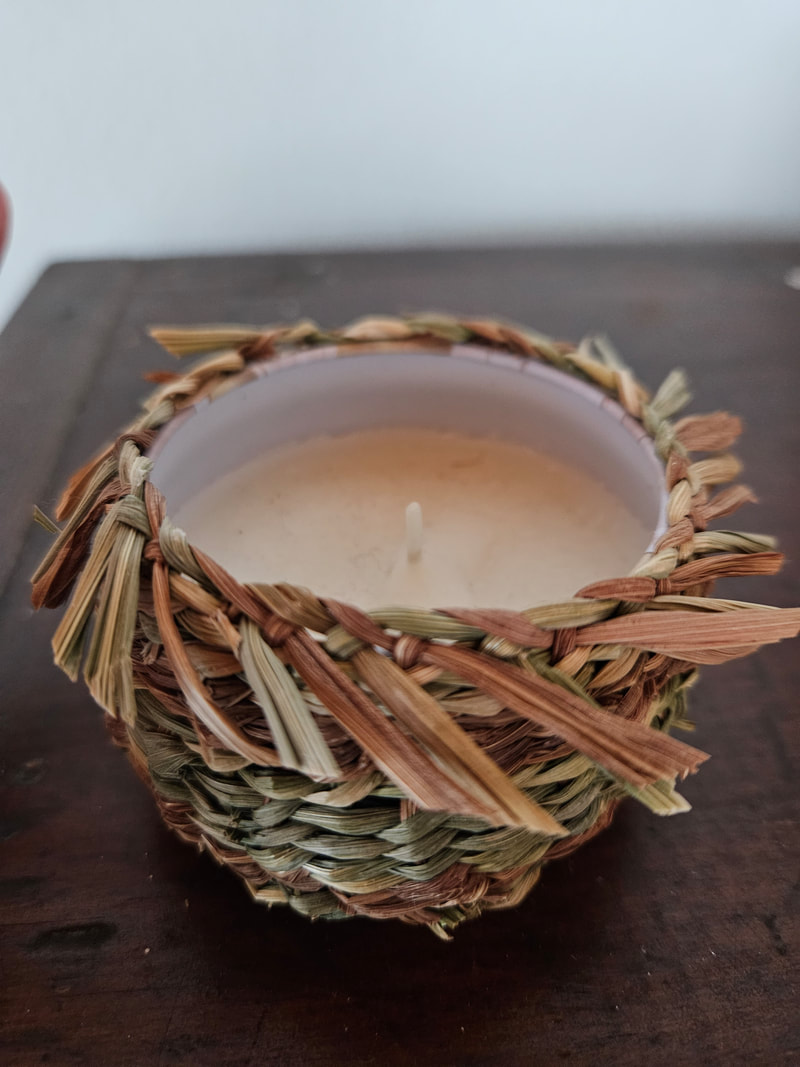
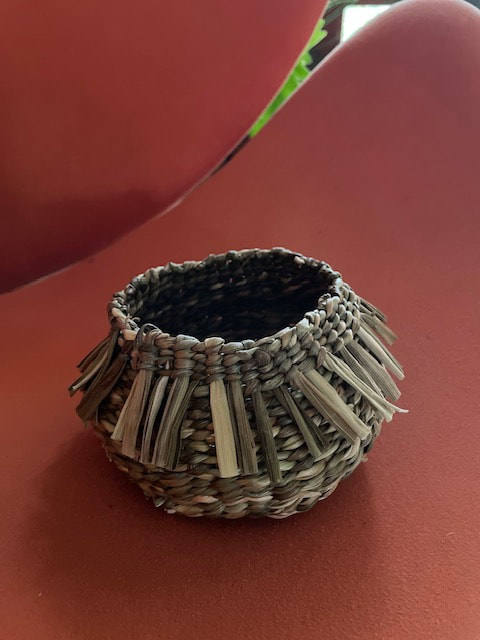
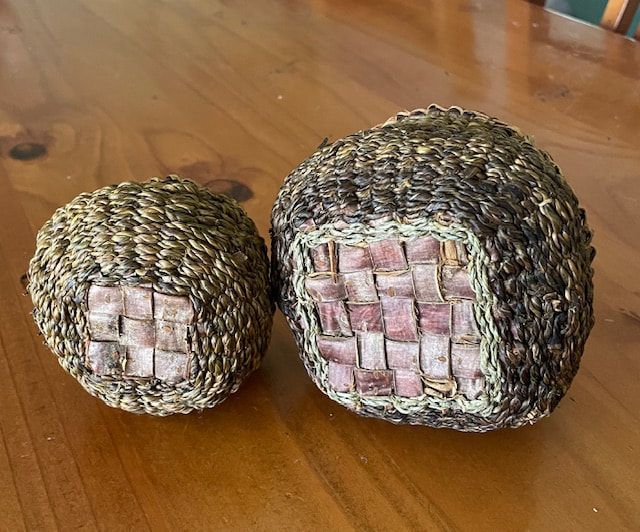
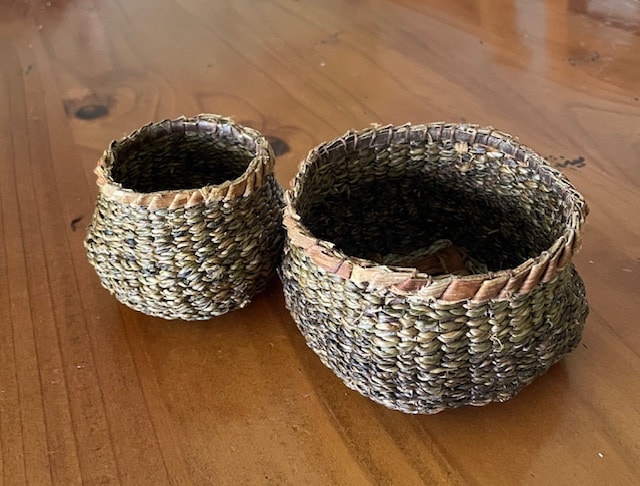
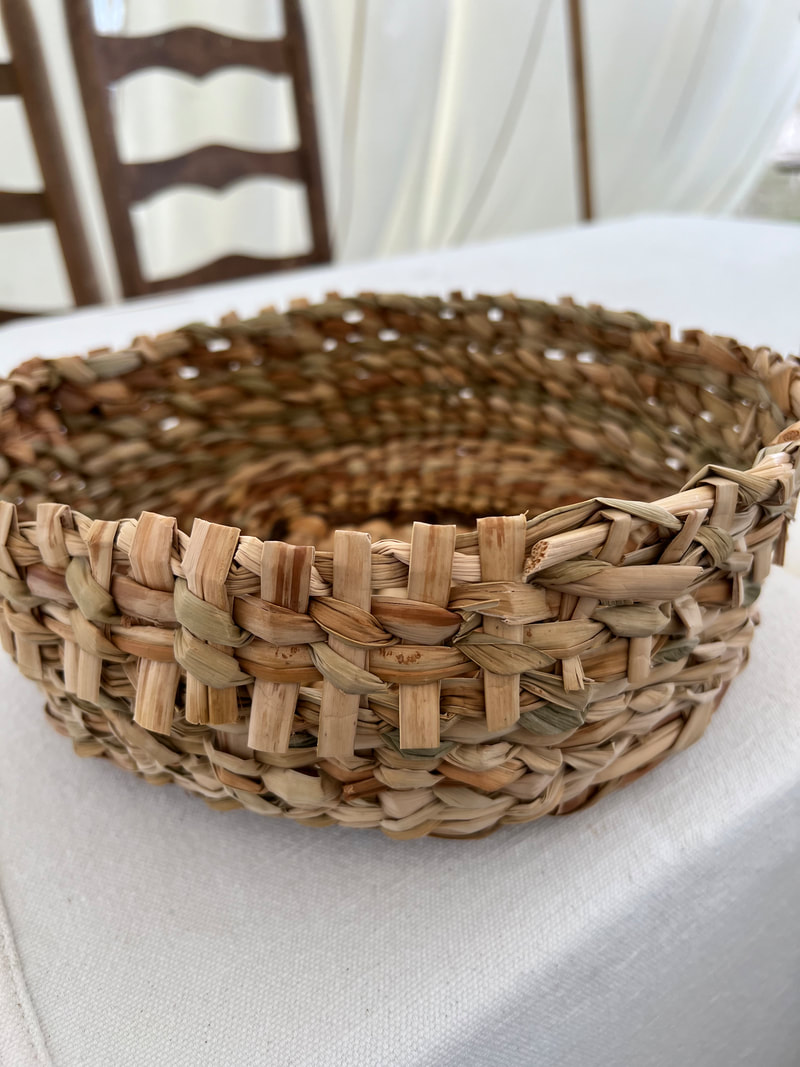
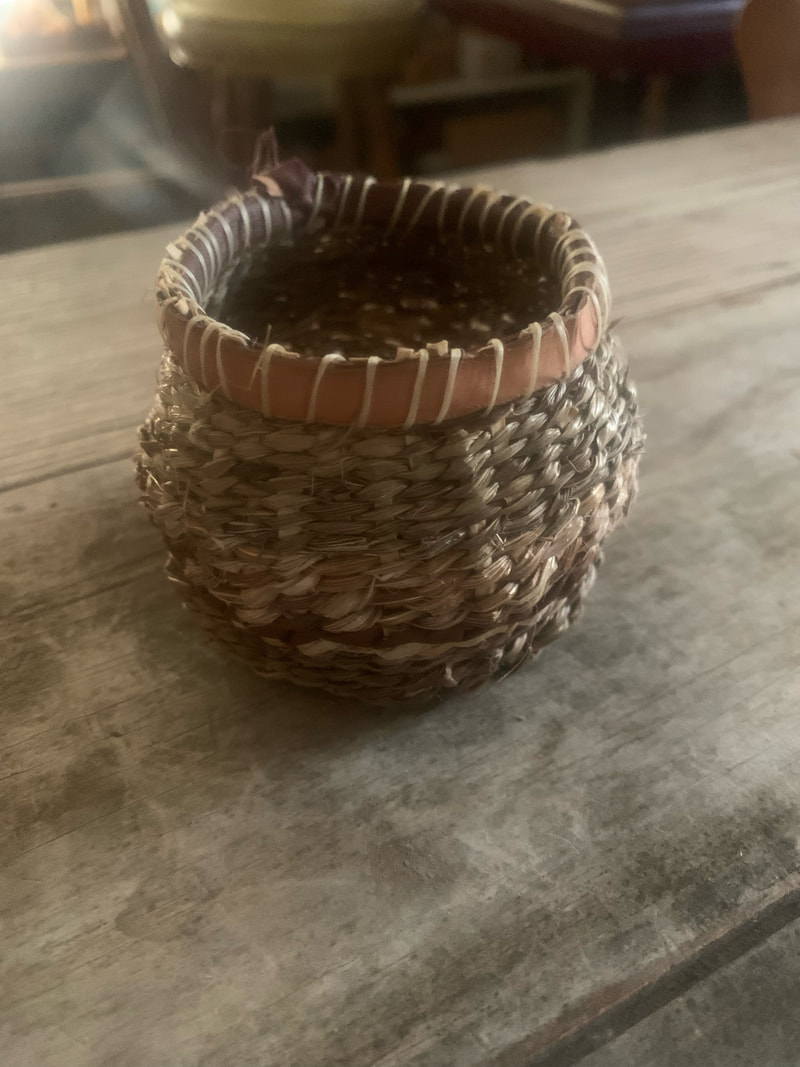
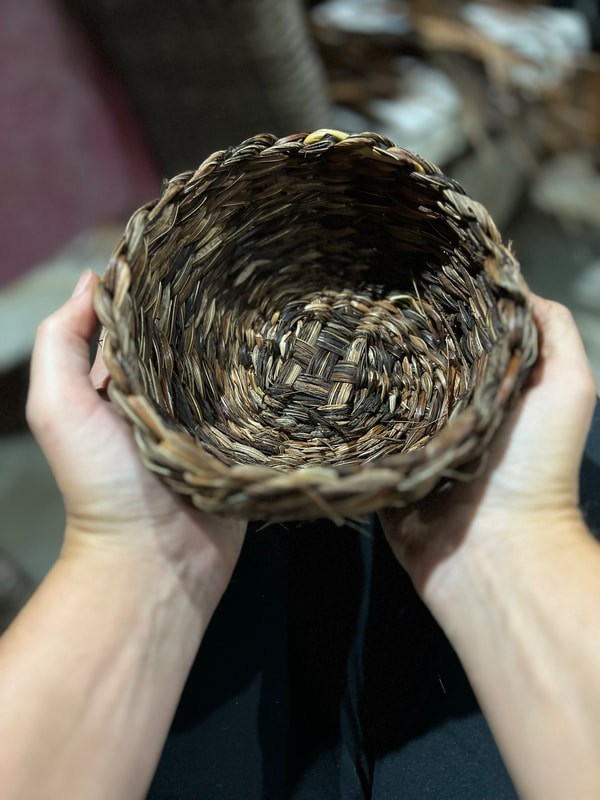
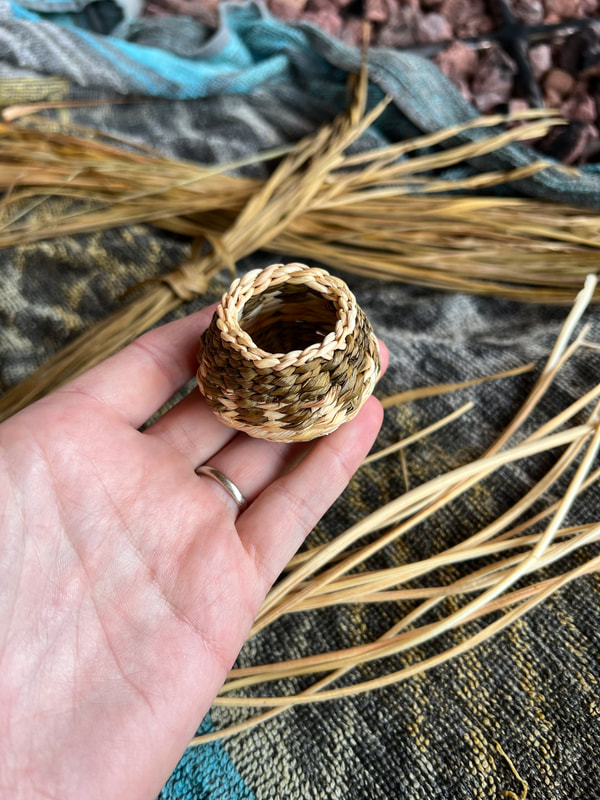
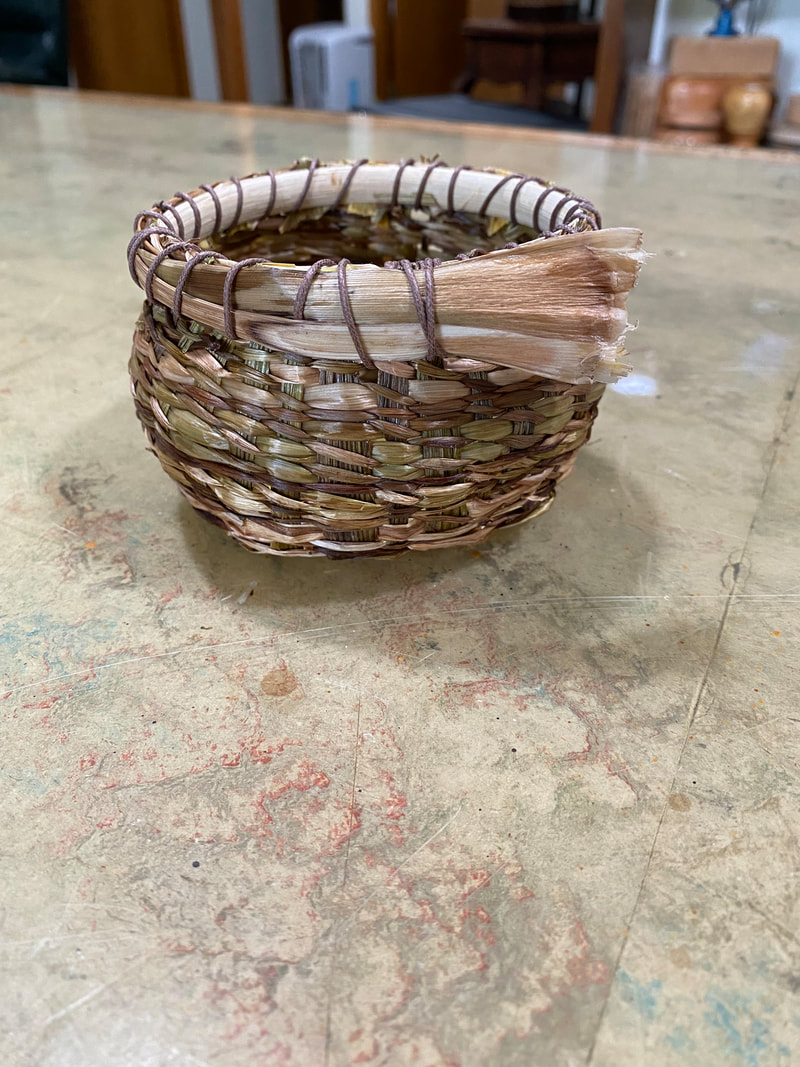
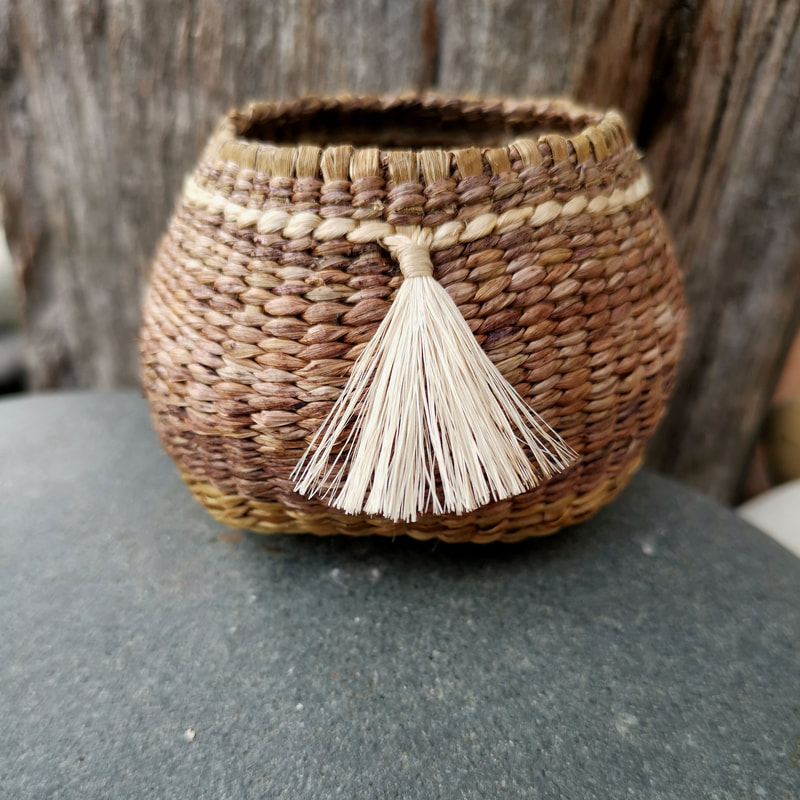
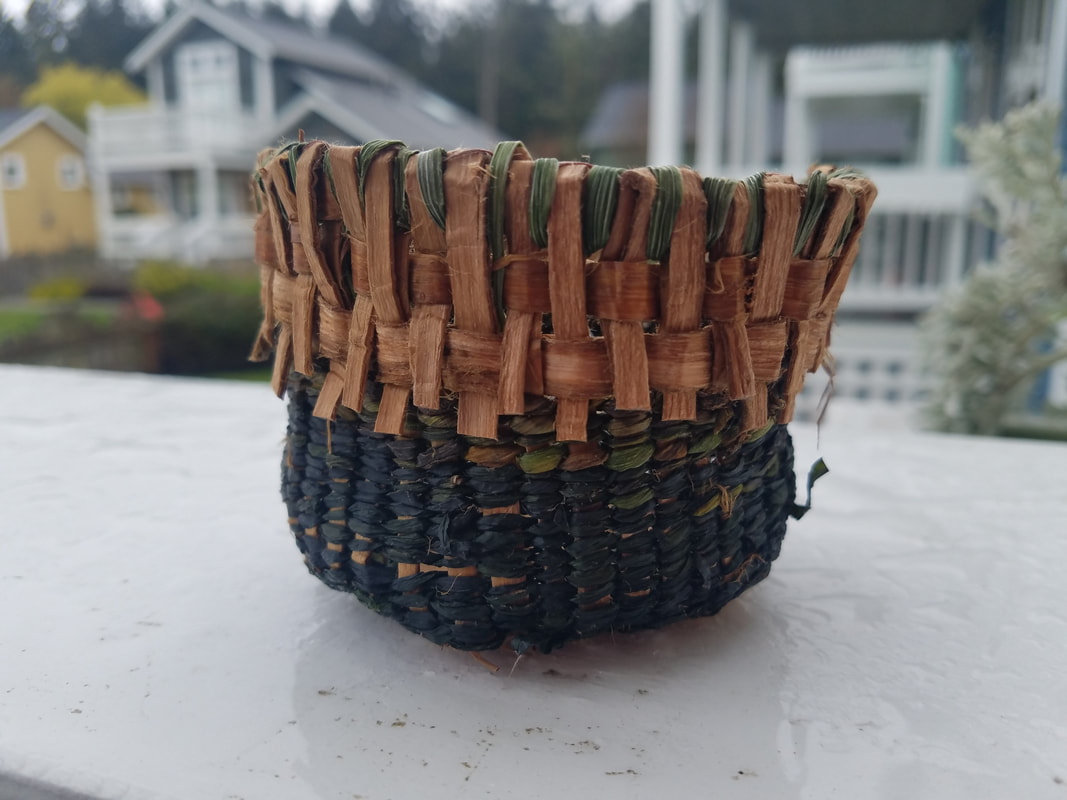
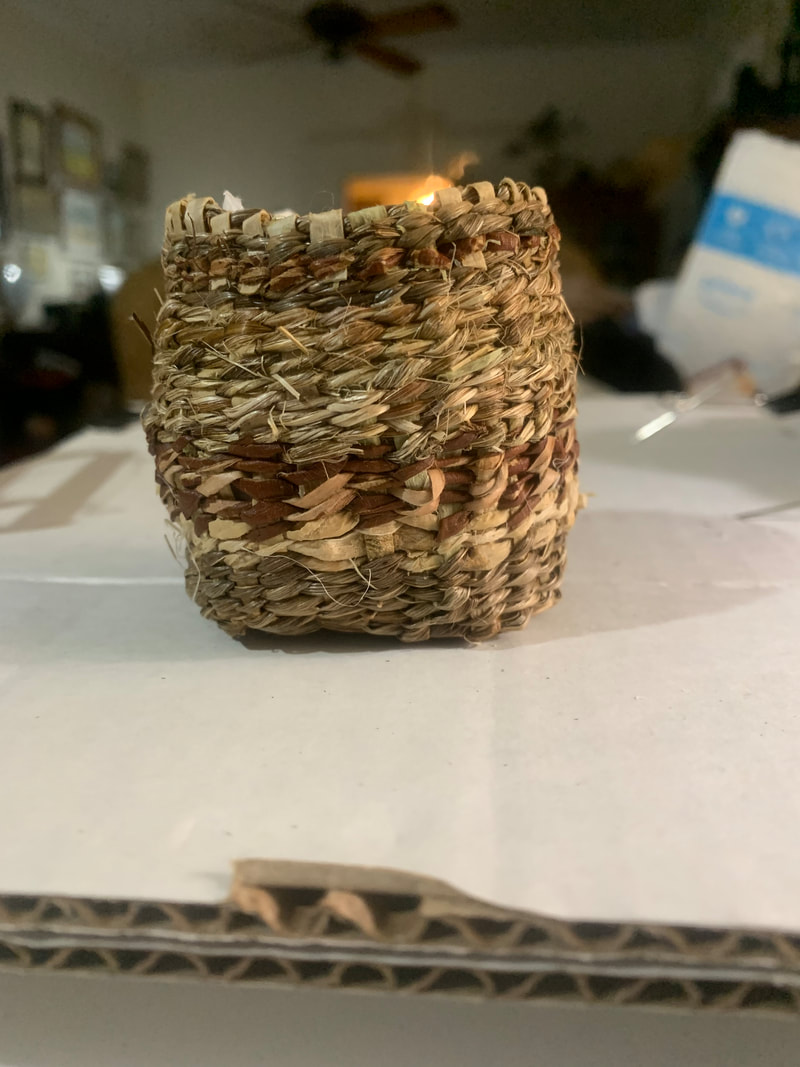
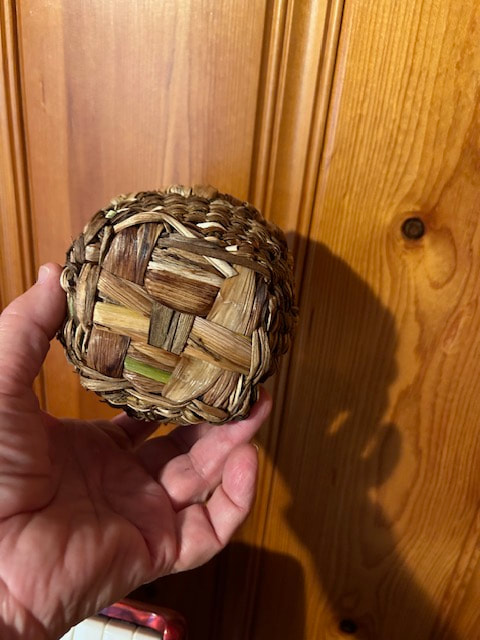
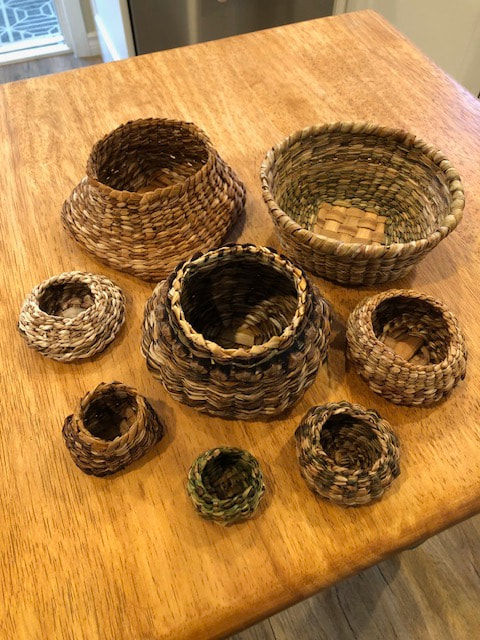
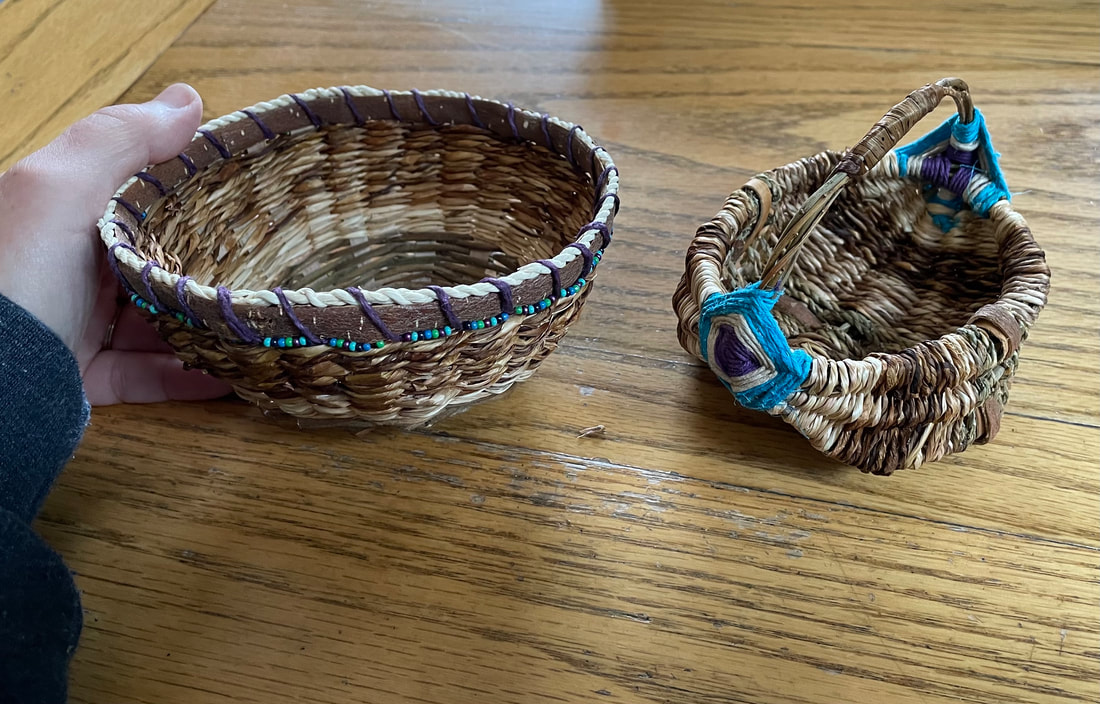
Each week inside my Natural Basketry School, we welcome new makers from around the world. And the exciting part is that most have never made a basket before, much less harvested or prepared their own materials. But with a little encouragement from our community and some simple video instruction from me, they start to create beautiful baskets they can be proud of. Baskets they can enjoy in their home, give as gifts and for some, even sell for extra income. This blog post is specifically designed to celebrate some of the latest work from my students. All the images below are from them and I am super proud of them. If you'd like to learn how to make baskets using natural materials, I'd like to invite you to check out my online basket weaving courses.
0 Comments
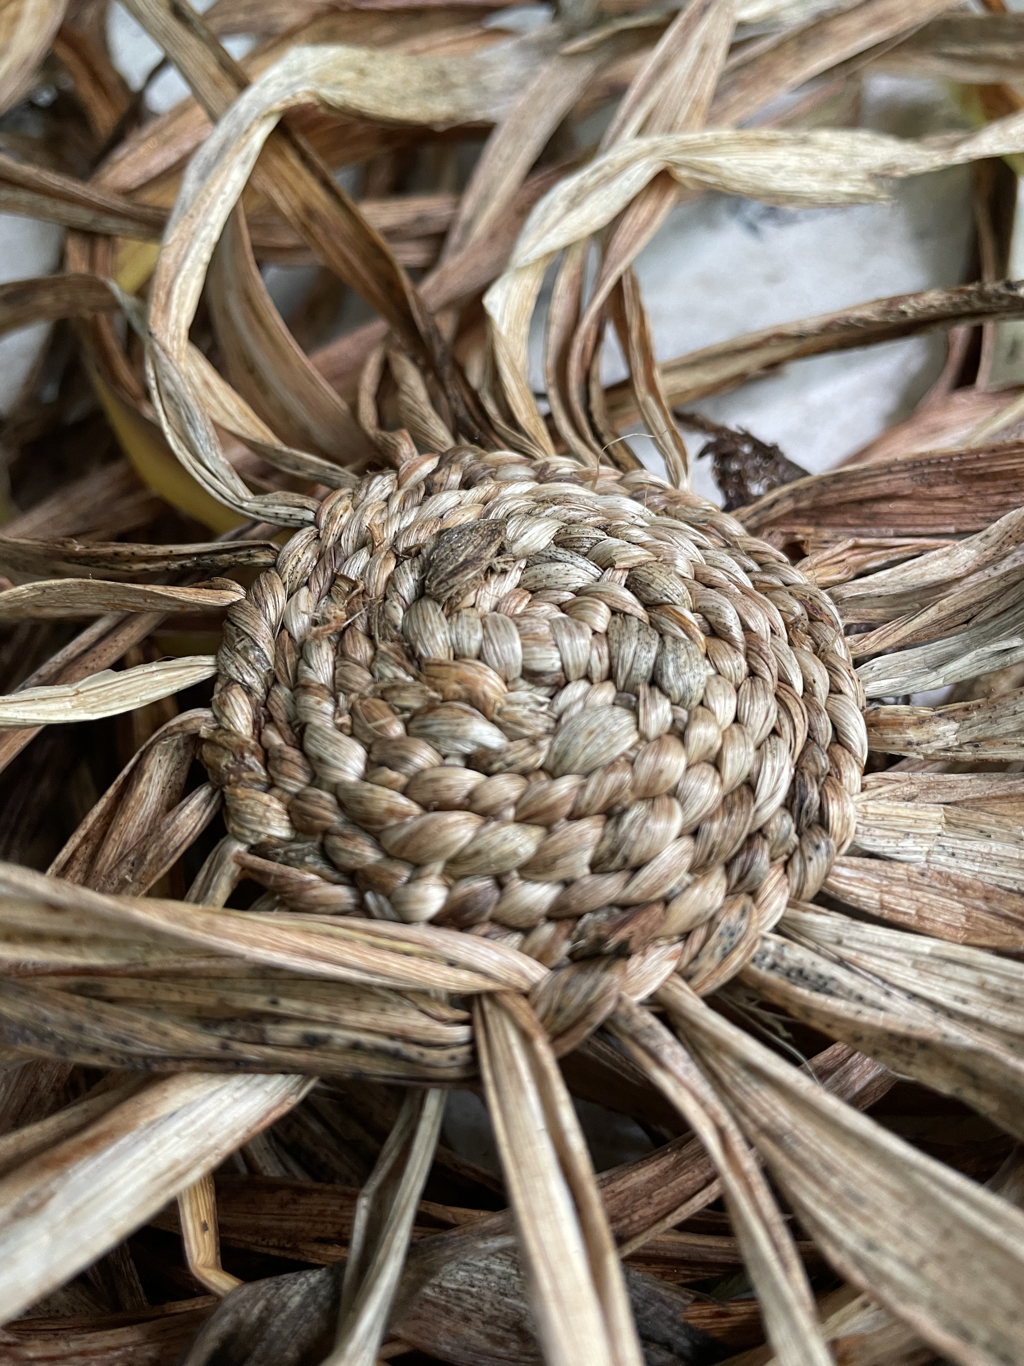
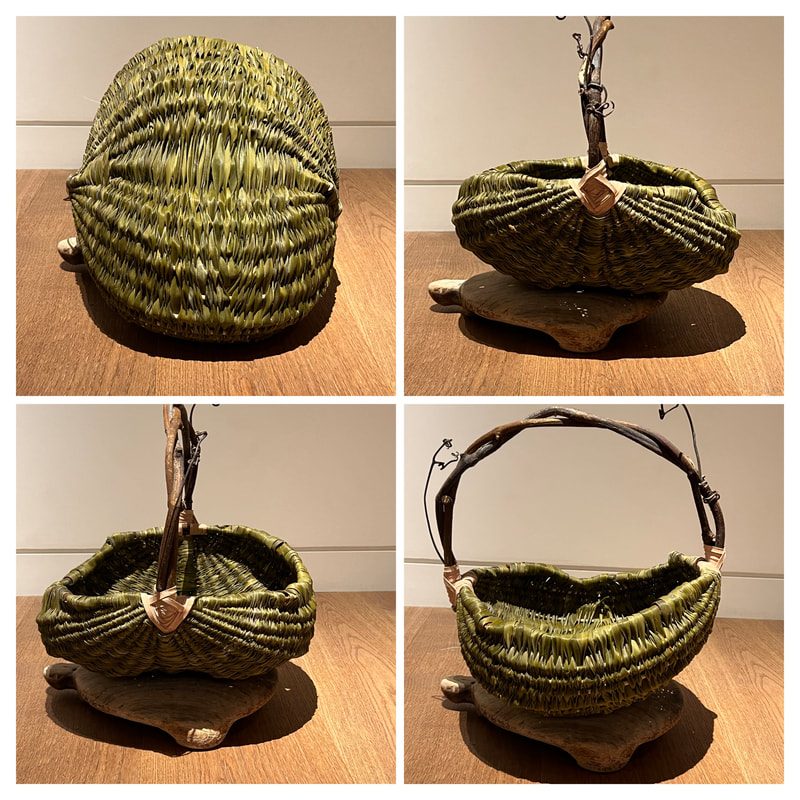
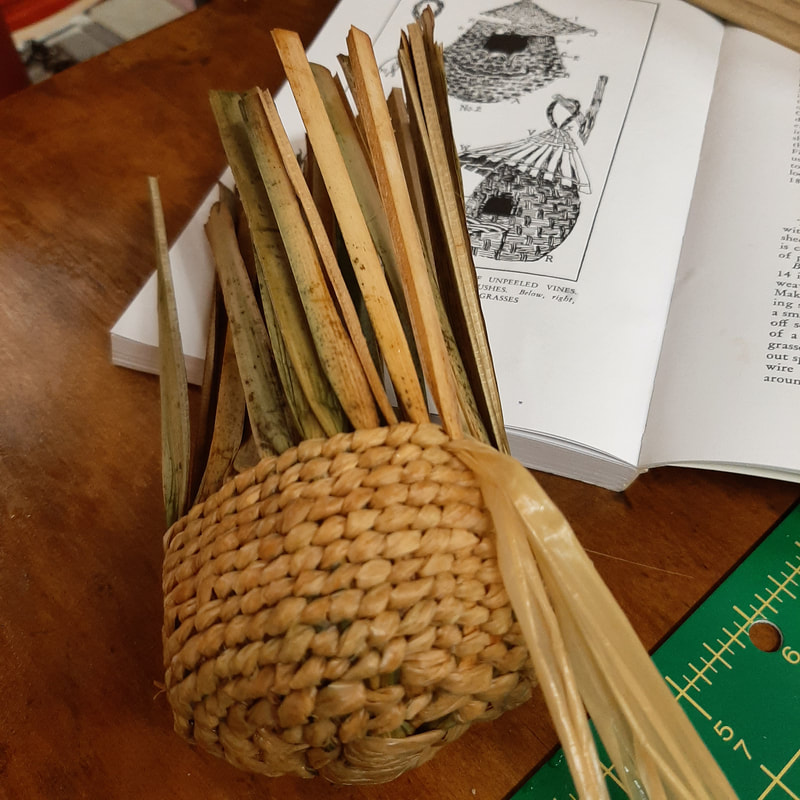
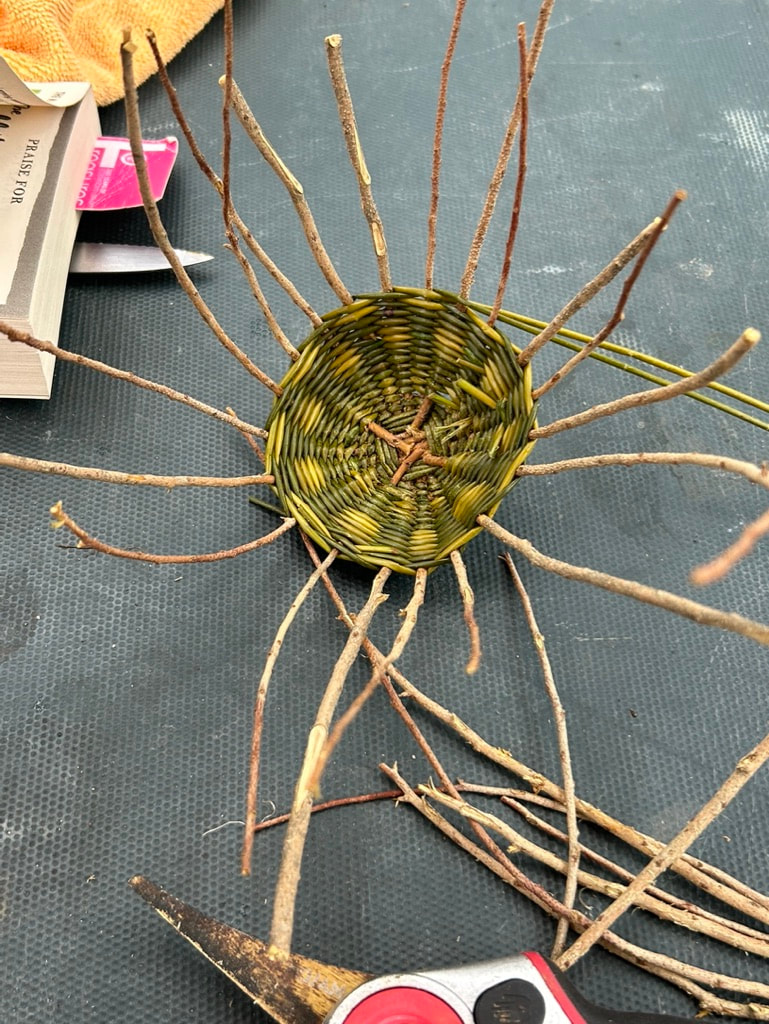
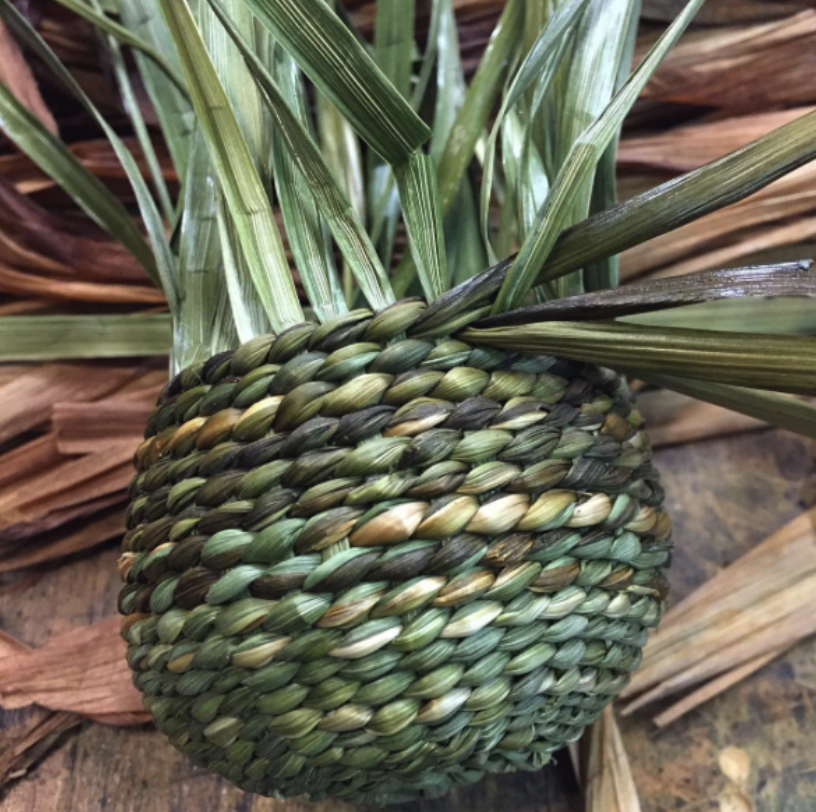
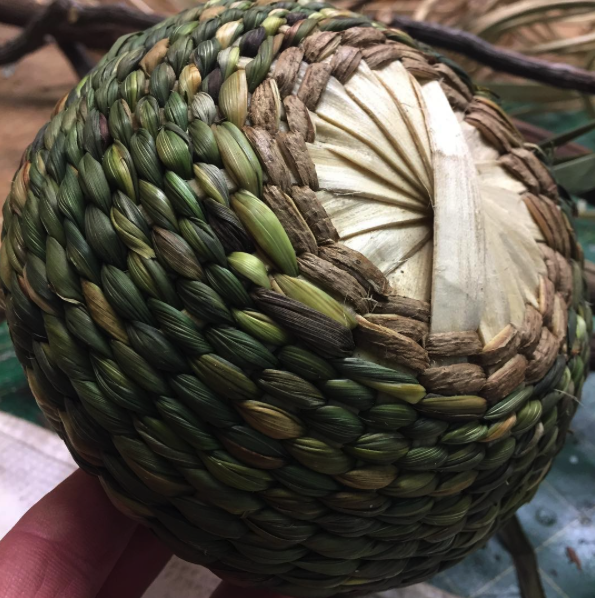
Basket base made with naturally wilted day lily foliage.
Fall weather brings the changing of colors and seasons. Cool air wisps through the trees, flowers begin to fade, seeds drop for next years blooms and foliage wilts. It can seem like a really depressing time in the garden, but not for the basketmaker!
While there's little to look forward to in fall garden cleanup, nothing is better than working in the garden on a cool fall day only to stop, gather and weave some daylily foliage. A welcome respite to the mundane nature of pruning and mulching. **GET MY ONLINE BASKETRY COURSE, Twining with Soft Natural Materials** Leaf weaving is about so much more than product… it’s the meditative process of creating, an invitation to slow down and listen. And for me, it's always been a bit of an escape from the rushed schedule of daily life. A walk in the woods. The discovery of materials. The adventure of preparation. The unlimited opportunities that lay waiting in the studio with natural materials so purposefully gathered. As a professional basketry artist for now approaching 30 years, I can say without question my favorite times weaving are still sitting on the ground, in the garden with fresh materials... no prep, no plan. Just materials and me. It's from that place that my artistic voice has emerged and my commercial work has prospered. People can feel the intent, the love, the purpose in my work and that means everything.
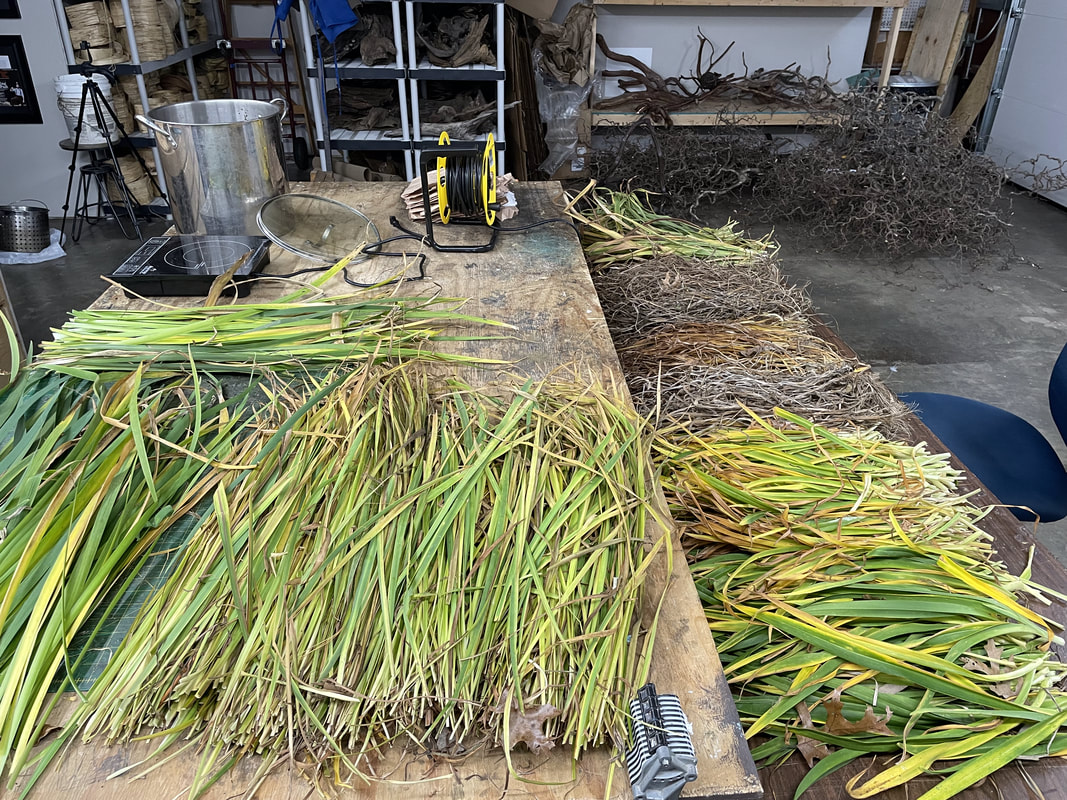
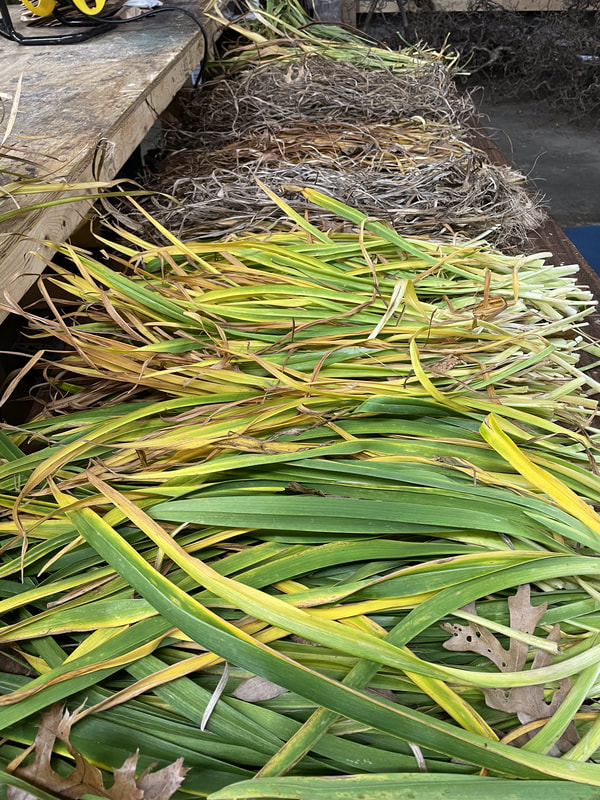
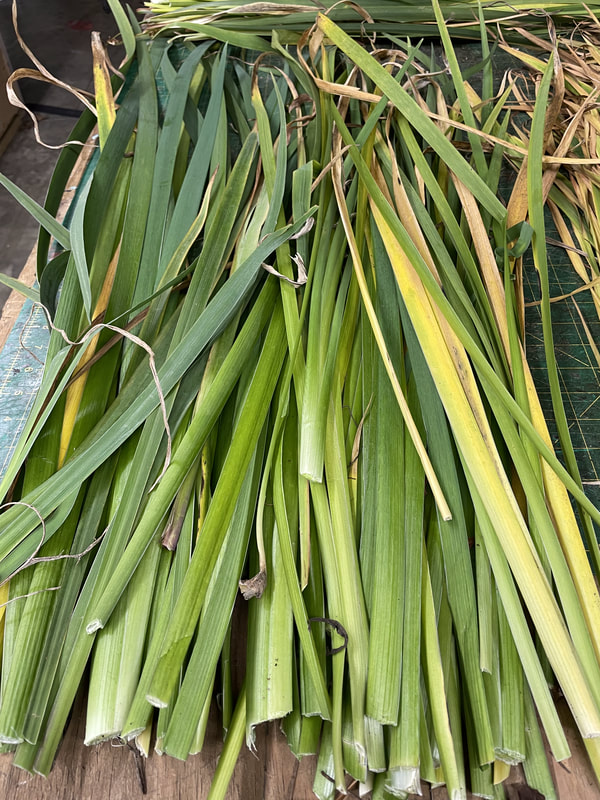
(L to R) Yellow Iris, Purple Siberian Iris, Day Lily foliage for basket weaving.
Harvesting Day Lily Foliage for Basket Weaving
As with most things in art, there's rarely a "right way" to do anything... only the way that works for you. However, over the years I've found that I harvest day lily foliage in two primary ways: collected during the growing season and cut at the end of the season.
When daylily foliage is growing, it's always putting on new growth from the center of the plant, and pushing the old foliage down to the sides. Eventually, that foliage dries, wilts and dies while still connected to the plant. It doesn't look great and it's best to remove it so as to give your plant "breathing room." This foliage, in my opinion, is the best for weaving. Nothing beats the preparation nature provides in the natural wilting process. Once you harvest these, simply let them dry completely and then store in a cool, dry place until ready to use. You can also cut day lily foliage at the end of the growing season. I usually wait until the first frost so it begins to wilt and yellow but doesn't ruin. Again, let it dry completely in a cool, dry place and then store until ready for usage. You'll notice that different varieties of daylily (and iris) have different kinds of foliage. Some are longer and fatter than others. Of course, being a basket maker, I choose my flowers by the length of foliage they provide, long being best. Other Foliage Plants for basket weaving
Just because I'm talking about day lily and iris foliage doesn't mean you can't use other foliage available in the garden. Some of my other favorites include daffodil (usually harvested in the spring after blooming, giving the plant a few weeks to rest and begin to wilt.) Also other common plants like red hot poker, crocosmia and many others. Daffodil sap in particular can be irritating to the skin, so be careful as you harvest. Wear gloves, long sleeves, avoid touching your face and be sure to wash up thoroughly after harvesting.
Iris foliage doesn't mean you can't use other foliage available in the garden. Some of my other favorites include daffodil (usually harvested in the spring after blooming, giving the plant a few weeks to rest and begin to wilt.) Also other common plants like red hot poker, crocosmia and many others. Daffodil sap in particular can be irritating to the skin, so be careful as you harvest. Wear gloves, long sleeves, avoid touching your face and be sure to wash up thoroughly after harvesting.
Now, let's take a closer look at the leaves and flowers of the Iris plant. The leaves of Iris are long, strap-like, and sword-shaped, overlapping at the base, and oriented in one plane. They create an elegant and uniform arrangement that adds grace to any garden. Moving on to the flowers, they are truly a sight to behold. The blooms are often carried at the top of a naked stem, standing tall and proud. They can range from a single majestic blossom to a cluster of several delicate flowers. The Iris flowers are characterized by their mesmerizing 6-parted structure. Three outer 'falls' spread or pendant, catching the eye with their distinct markings, while three inner 'standards' proudly stand erect, adding a touch of elegance. What makes Irises truly special is their incredible color palette. From mesmerizing blues to enchanting violets, vibrant yellows to warm oranges, pure whites to mysterious blacks, Irises offer a spectrum of hues that can brighten up any garden. These captivating flowers are highly prized as cut flowers, adding beauty and vibrancy to perennial gardens. So, while Iris foliage is undoubtedly beautiful on its own, don't hesitate to explore other foliage options in your garden. Just remember, when harvesting plants like daffodils, be cautious of their sap, which can cause skin irritation. Protect yourself by wearing gloves and long sleeves, and remember to wash up thoroughly after harvesting. With the combination of Iris's stunning leaves and exquisite flowers, along with the possibilities of incorporating other foliage, your garden will be a true showcase of nature's beauty. Using Iris In Landscaping to Create a Basketry Garden Iris plants offer a multitude of possibilities when it comes to landscaping. Not only do they provide stunning blooms, but their foliage can also be put to creative use. For instance, Iris foliage can be harvested and used for basket weaving, adding a unique touch to your outdoor space. This is just one of the many ways in which you can incorporate Iris into your landscape design. In addition to their foliage, Iris plants blend effortlessly with other popular flowers like daffodils, red hot pokers, and crocosmias. By carefully selecting and arranging these plants, you can create a vibrant and eye-catching display in your garden. Consider planting Iris in small groups or mass plantings to maximize their visual impact. This technique works exceptionally well as border plantings, foundation plantings, or even alongside walkways, where they can guide guests through your landscape with their graceful presence. Iris plants also lend themselves beautifully to various garden styles. For those with a cutting garden, Iris is the perfect addition. You can harvest their blossoms to create stunning floral arrangements that bring the beauty of your garden indoors. Alternatively, if you're aiming for a charming and rustic atmosphere, consider incorporating Iris into a cottage garden. Their vibrant colors and delicate blooms will evoke a sense of nostalgia and create a whimsical ambiance. So, whether you're seeking to add a touch of elegance to your patio or infuse a meadow with bursts of color, Iris plants are a versatile choice. Their ability to thrive in different settings and their practical applications make them an ideal option for any landscape. By exploring the various ways in which Iris can be utilized, you can create a truly captivating and enchanting outdoor space. Enjoy the season and take time to walk through your garden to harvest materials for basket weaving. For more on harvesting natural materials, be sure to download my free PDF 7 Tips for Harvesting Natural Materials. 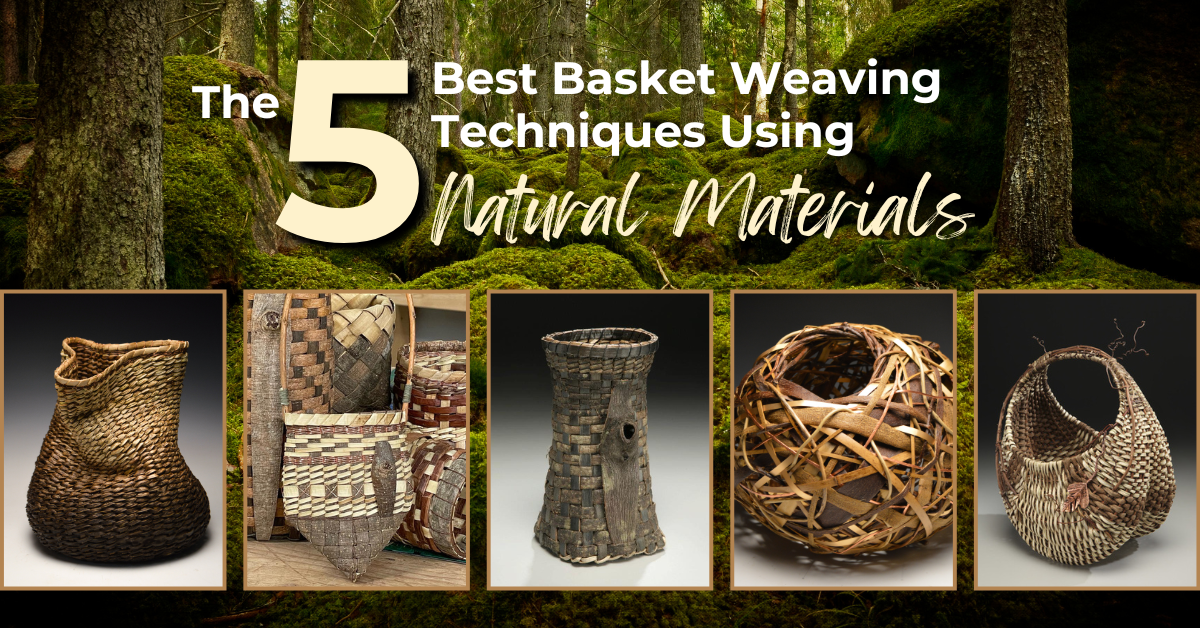
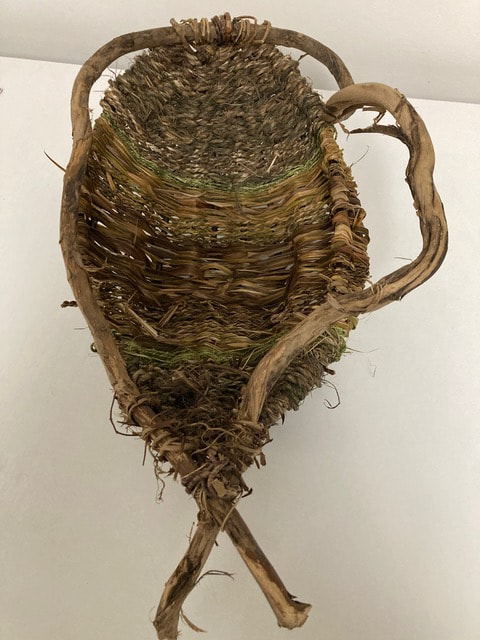
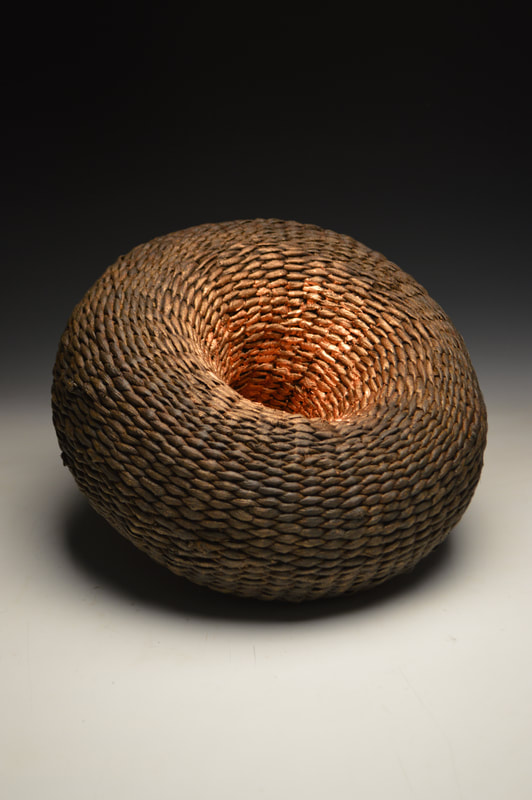
After making baskets for over 30 years exclusively with natural materials I harvest in my local area, I've discovered there are 5 basket weaving techniques that lend themselves best to the process of making baskets. They include twining, plaiting, twill, rib basketry and random weaving. As you'll see in my work below, I prefer to keep my weaving techniques simple and allow the natural beauty of the materials to shine through, creating the depth and interest desired.
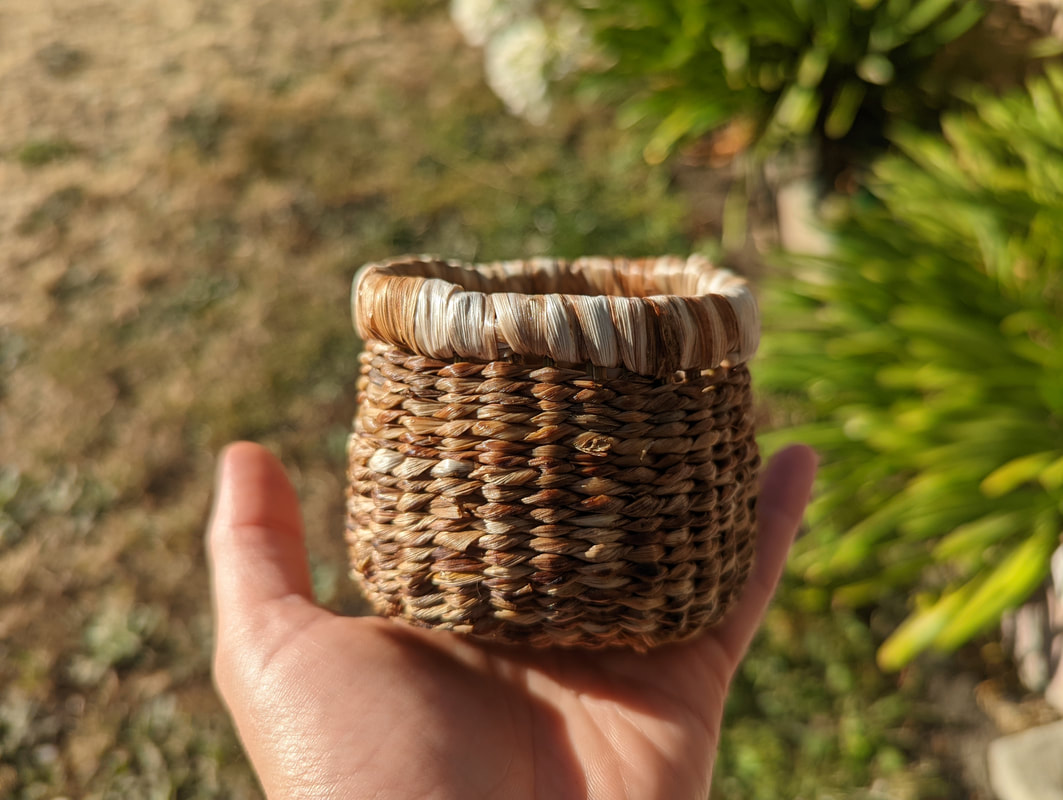
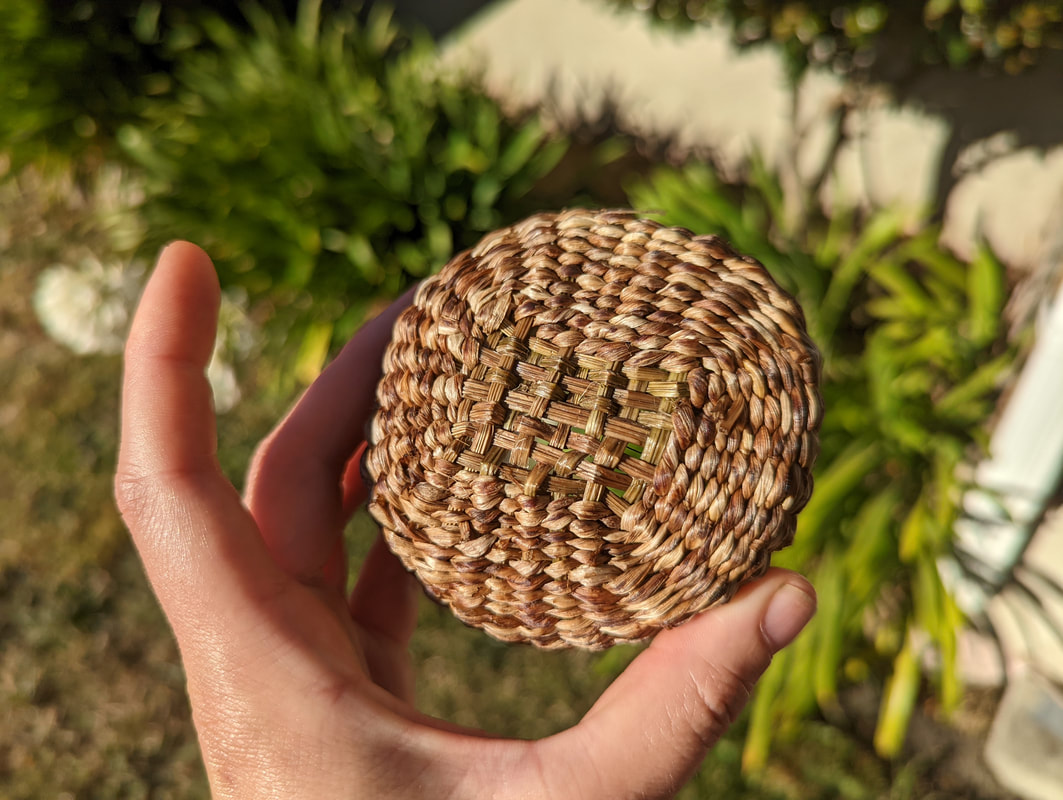
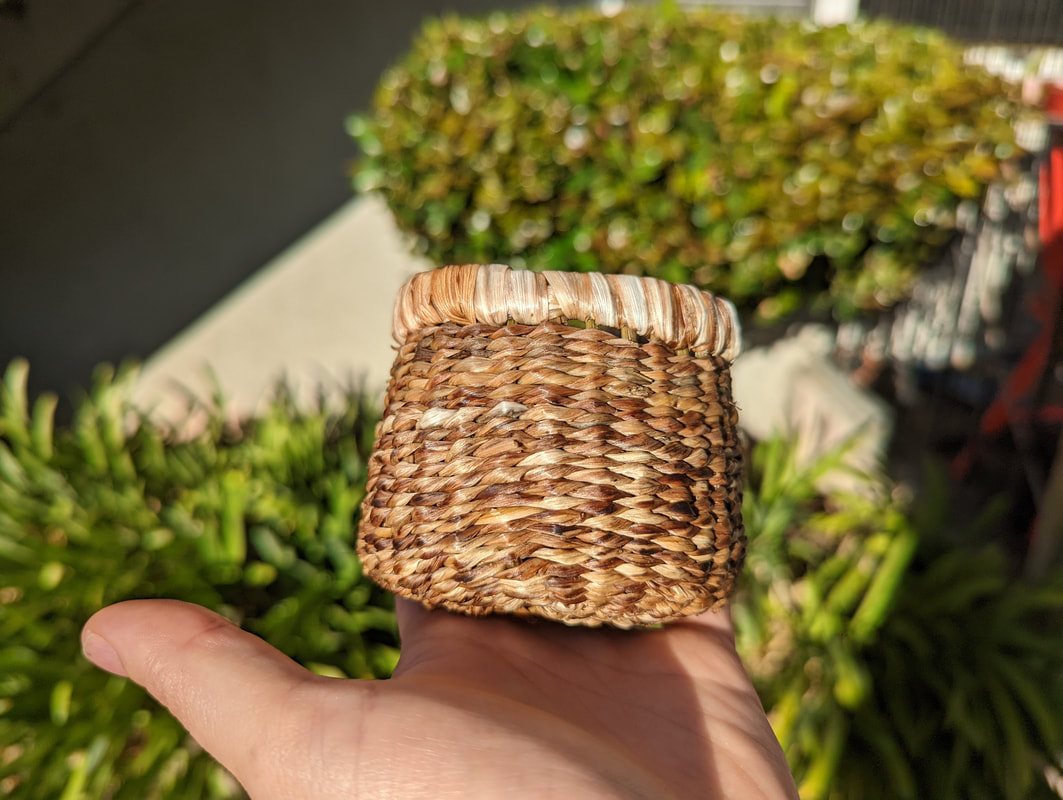
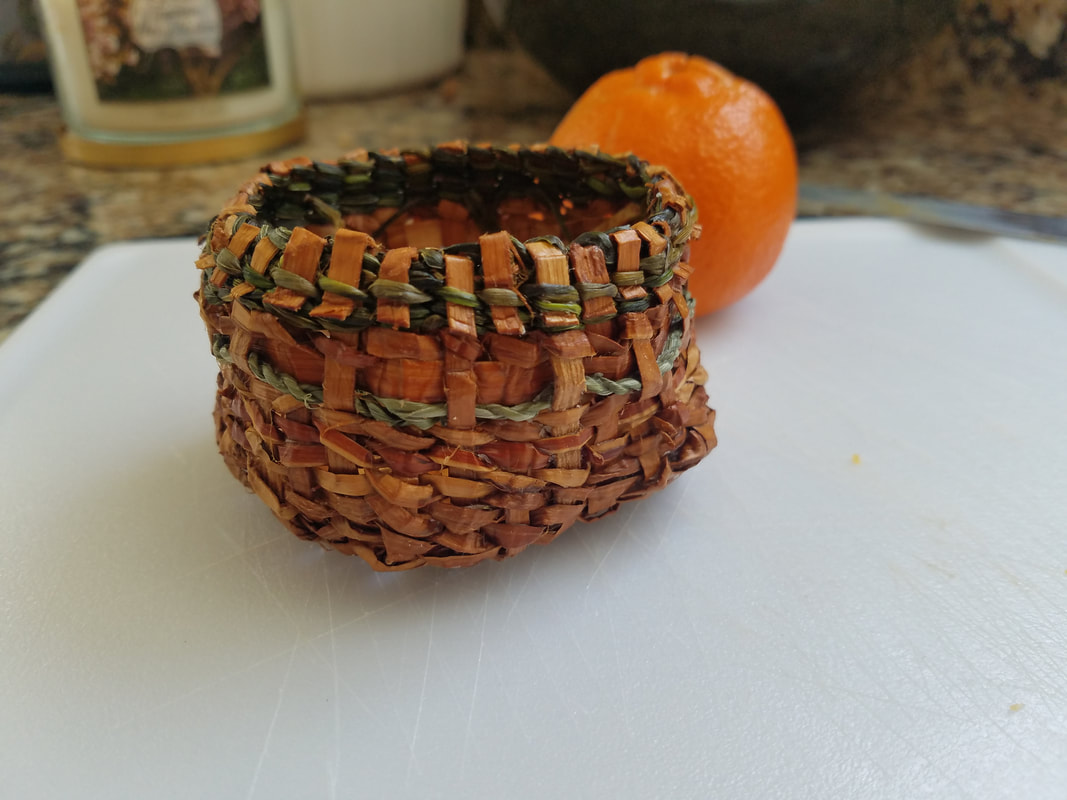
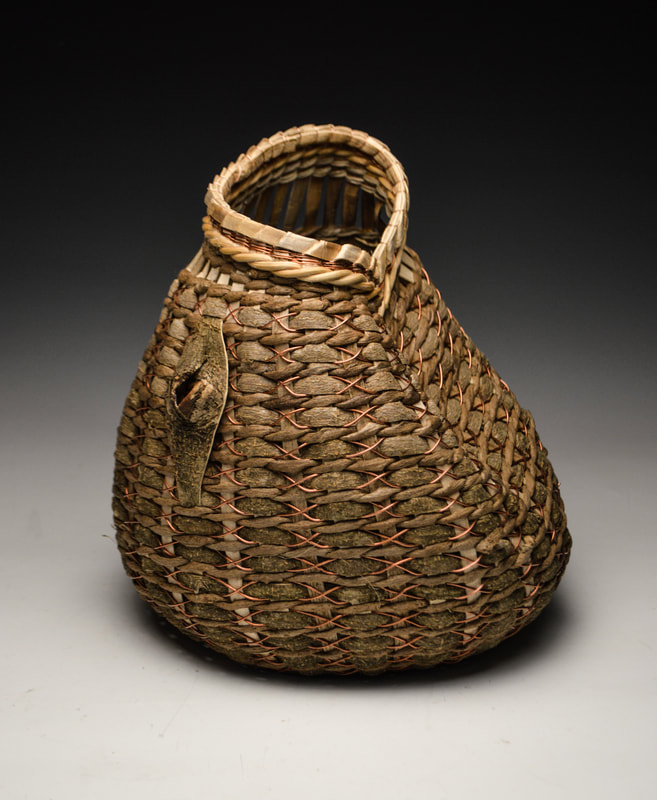
Twining Basket Weaving Techniques Twining is probably the most ancient of all the basket weaving techniques I use in my work. The word comes from the root word "twin", meaning two since it utilizes two pieces of like material simultaneously. Here's a quick video below to demonstrate the technique.
Twining is probably my favorite basket weaving technique because it's so easy to learn, able to be implemented in functional and artistic applications, and can be executed using a variety of soft and rigid materials from foliage and bark to reed and even metal. An excellent alternative to harvesting your own natural basket weaving materials for twining is raffia.  Raffia used in basket weaving Raffia used in basket weaving
Raffia is a natural fiber derived from the leaves of palm trees. It is available in different grades, which vary based on the fiber's length and overall quality. Longer pieces of raffia are suitable for the wrapping technique, whereas shorter strands (considered lower grade) serve as a filling material for baskets.
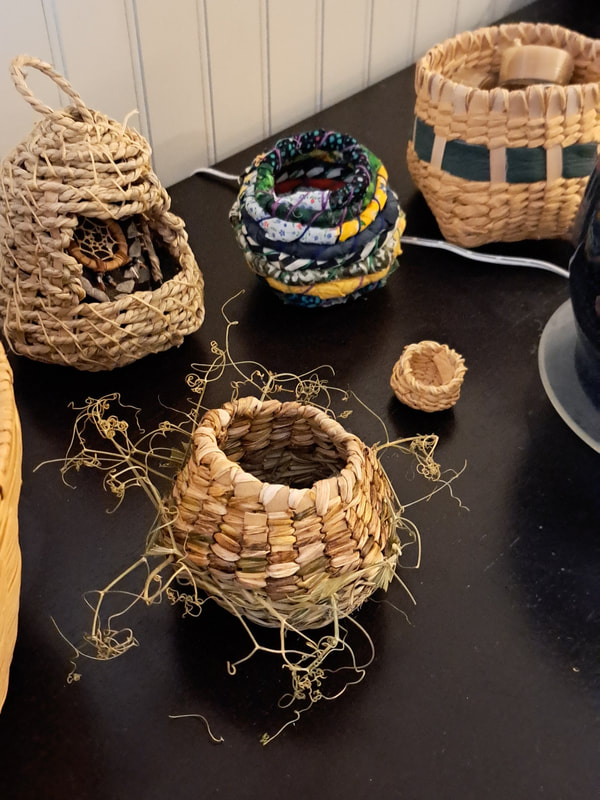
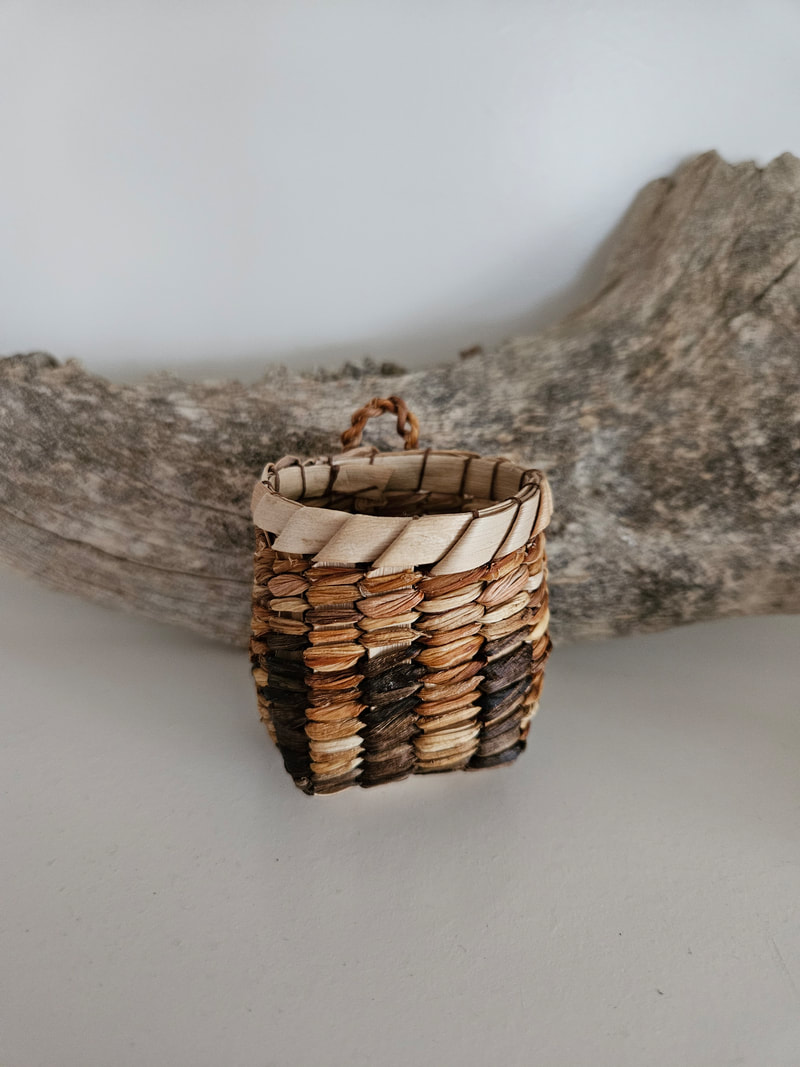
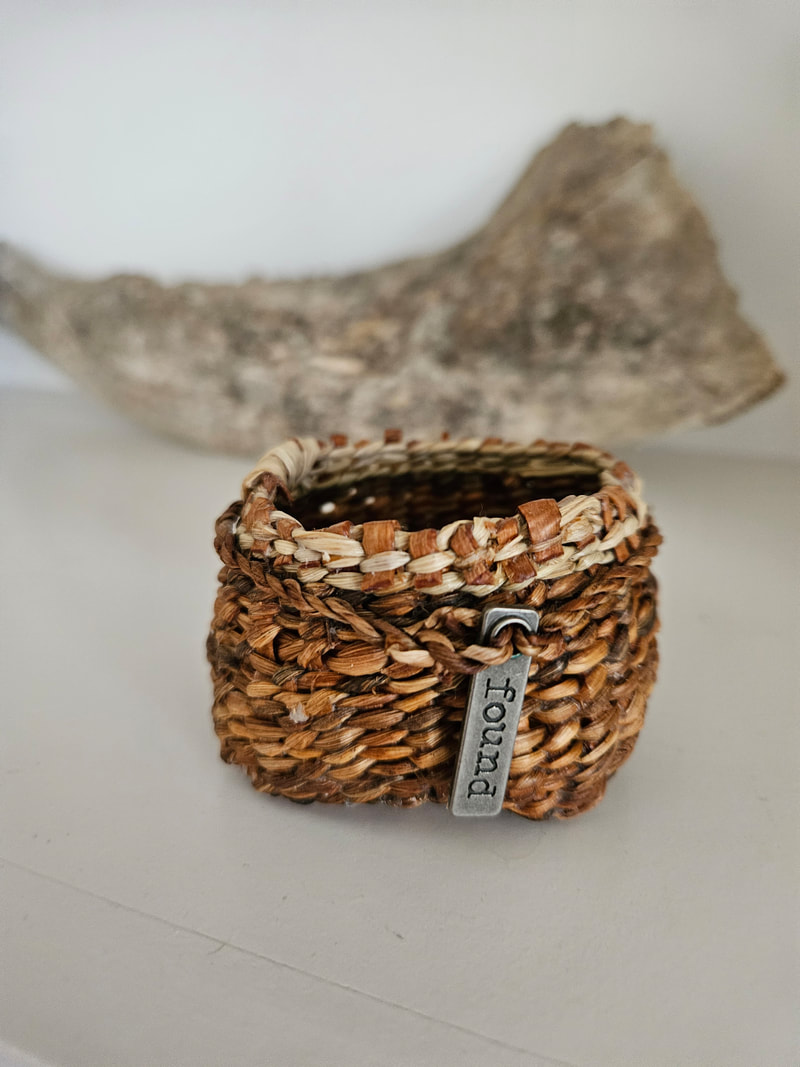
To obtain raffia, there are several options to explore. One reliable source is String Harvest, a supplier known for importing fair trade materials. Apart from specialty stores like this, you can also find raffia in regular art and craft shops, fabric supply shops, and even some floristry supply shops. Florists often use raffia to tie their bunches together. Additionally, online platforms such as Etsy offer a wide range of raffia options available for shipping within your own country. However, if you prefer not to purchase raffia or are uncertain about your interest in the craft, there are alternative materials that can be used instead. Fabrics, strings, twine, embroidery thread, and ribbons are among the various substitutes that can be employed. By utilizing these different materials, each with their own textures, weights, and weaves, you can achieve unique outcomes and appearances. This allows you to experiment and bring diversity to your creations without having to learn an entirely new set of techniques. Here are a few examples of twined pieces I've created over the years using natural materials I've harvested like vines, bark and foliage.
To learn more about how to twine and create beautiful baskets from natural materials, check out my online course, Twining with Soft Natural Materials where I show you step by step how to harvest, process and weave natural materials like foliage, vines and bark. The best part is, you can start making baskets within just a few days after watching this course, regardless of your experience level.
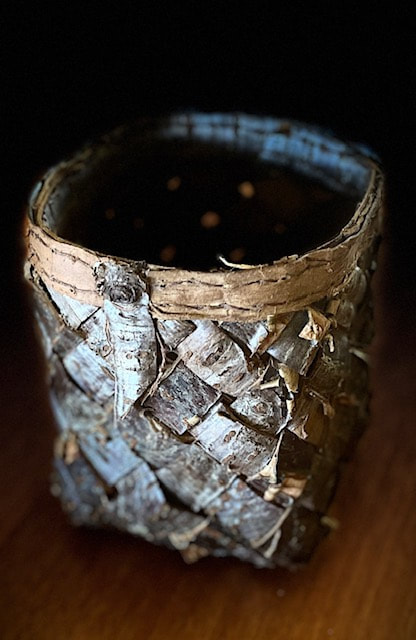
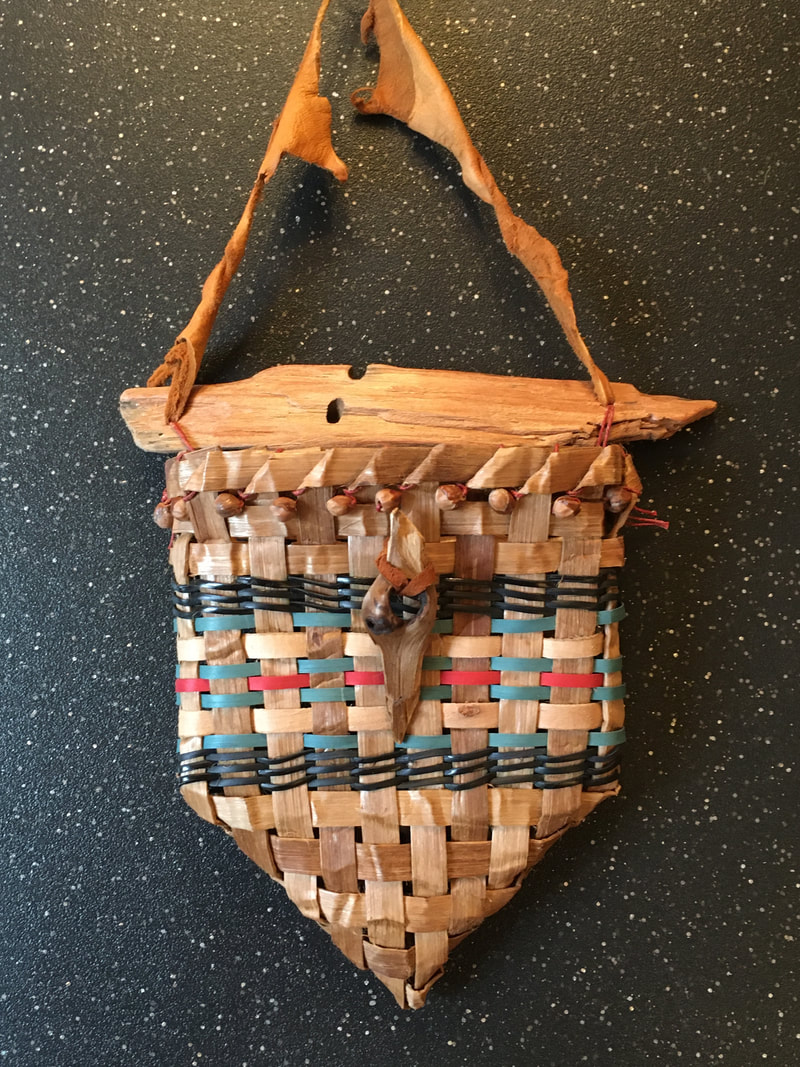
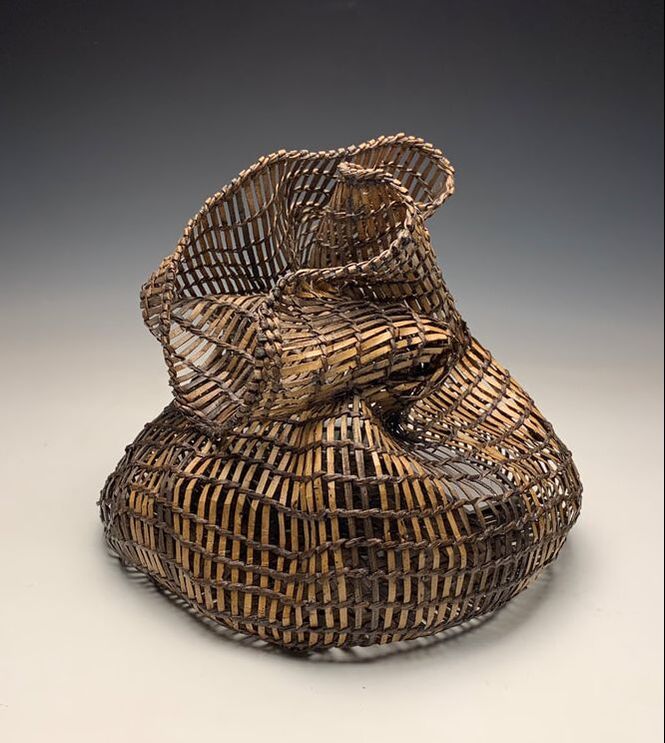
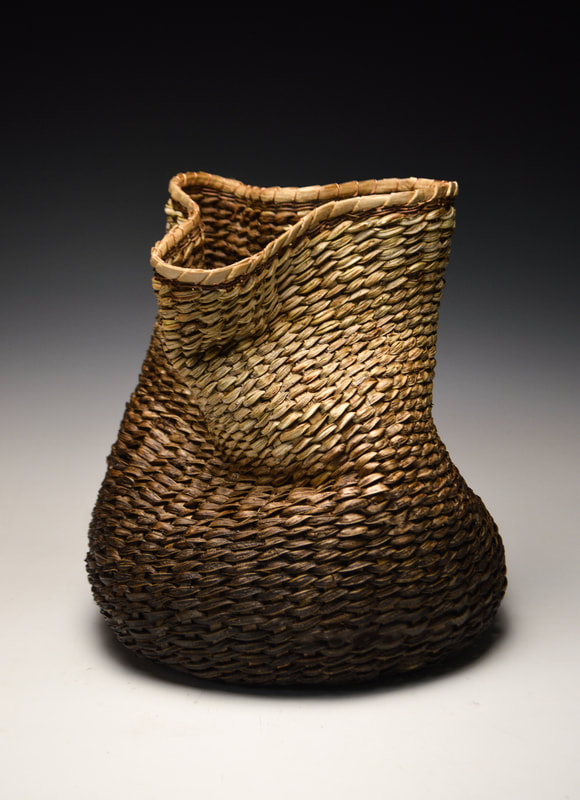
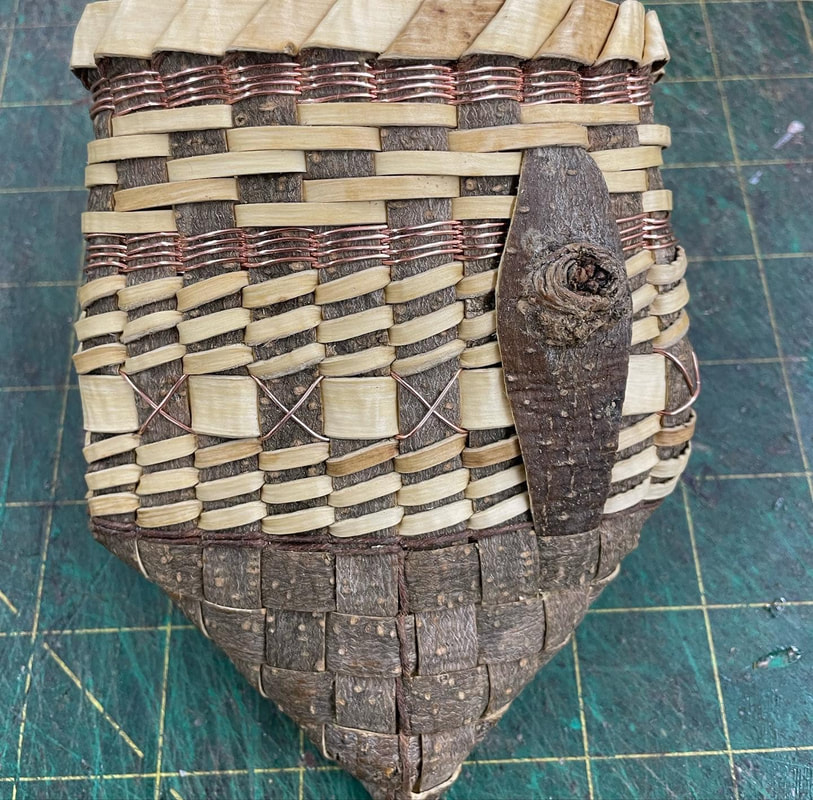
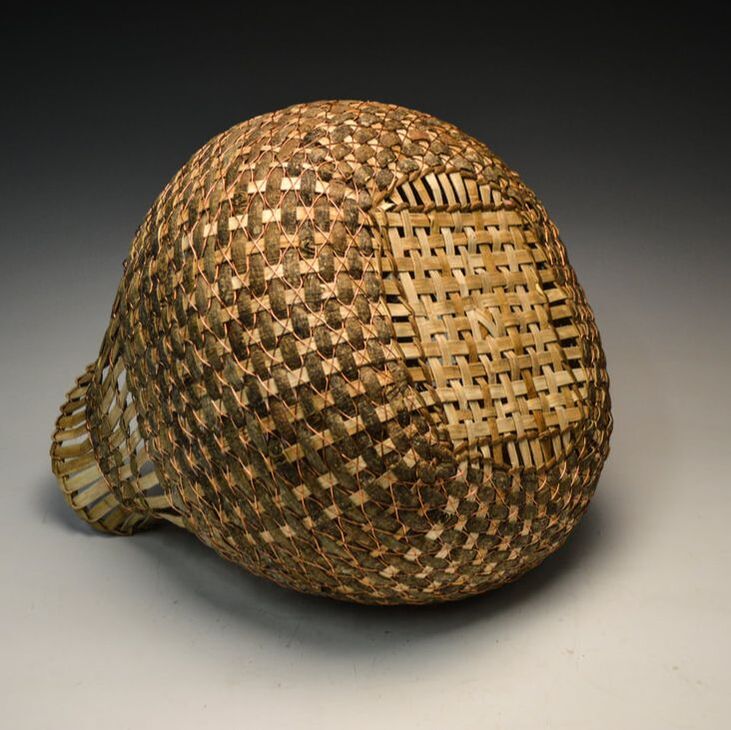
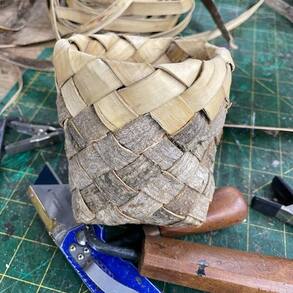
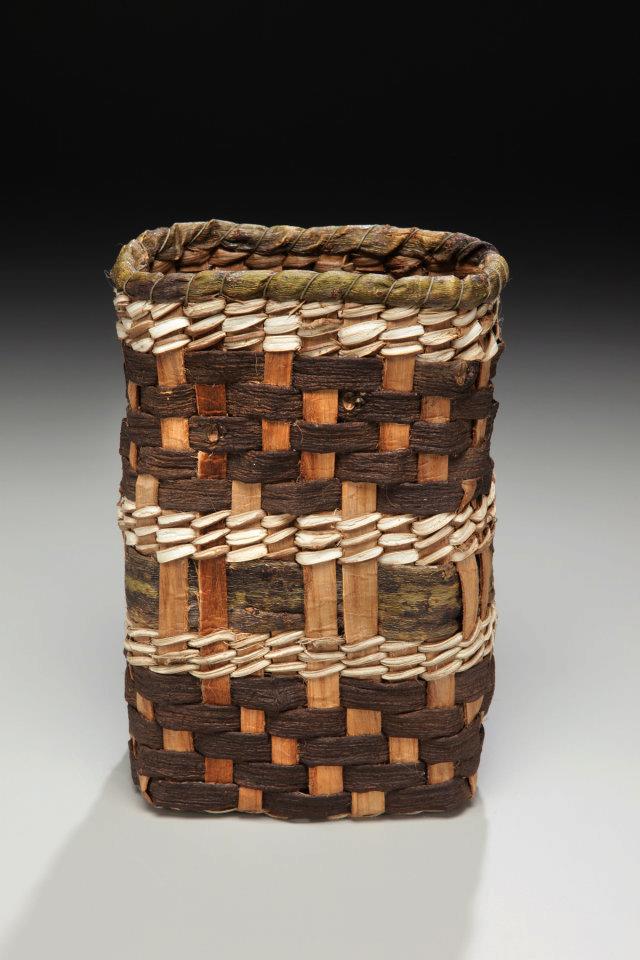
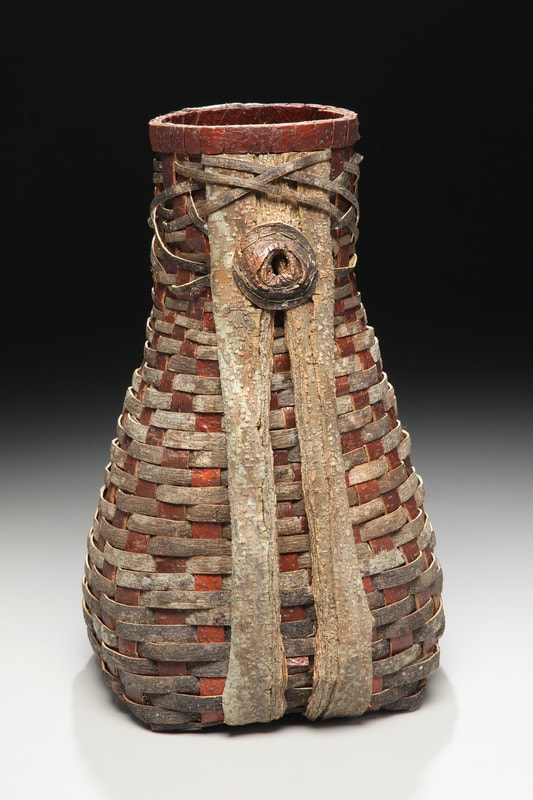
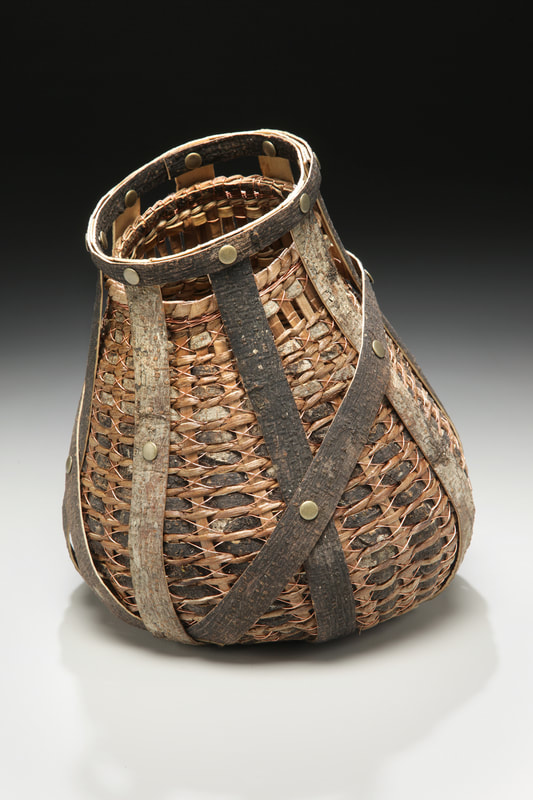
Plaiting Basket Weaving Techniques The next basket weaving technique is plaiting. Although plaiting can be done in a variety of ways, I really enjoy diagonal plaiting to create both functional and decorative bags, pouches and baskets. The best part is, plaiting works beautifully with bark, which is one of my favorite natural materials to work with. Here are a few examples of plaited baskets I've created over the years.
Twill Basket Weaving Techniques
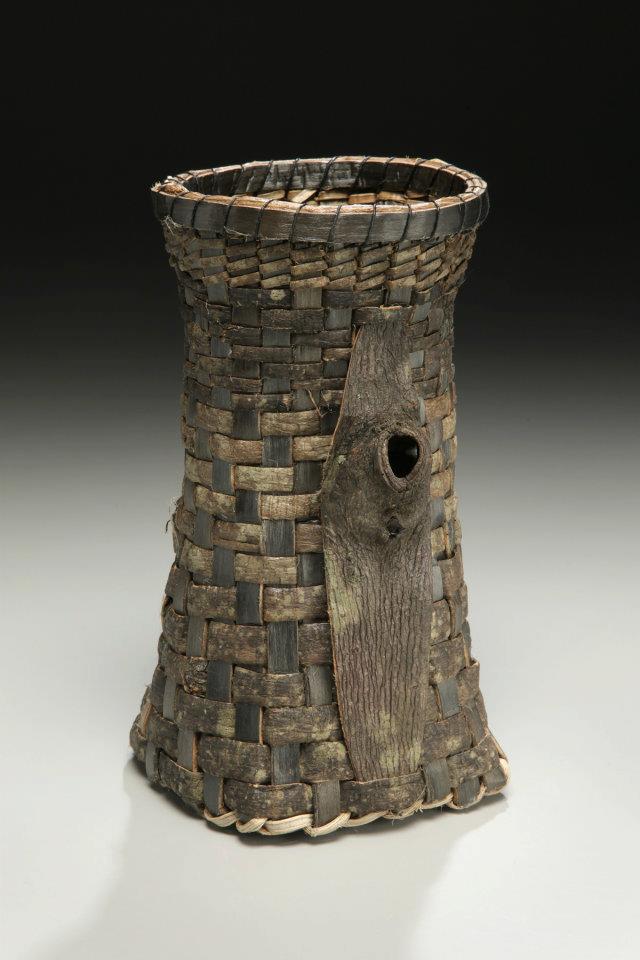
Another great basket weaving technique to use with flat materials like tree bark is what's called Twill. This is a more loose method of weaving that is based on using tension and skipping over stakes as you weave using a pattern. Common patterns include over 3 under 2, or over 2, under 1. There are many different variations of twill weaving that can be made really fancy with colors, materials and more complex designs like the quadrifoye. Below are are several baskets that I've created using tree bark and a twill basket weaving technique.
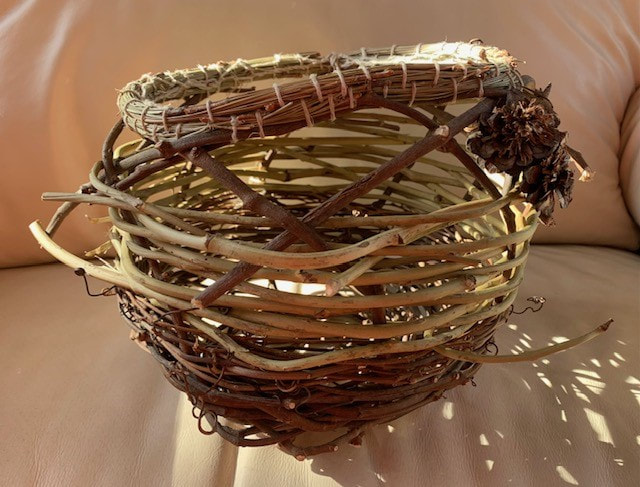
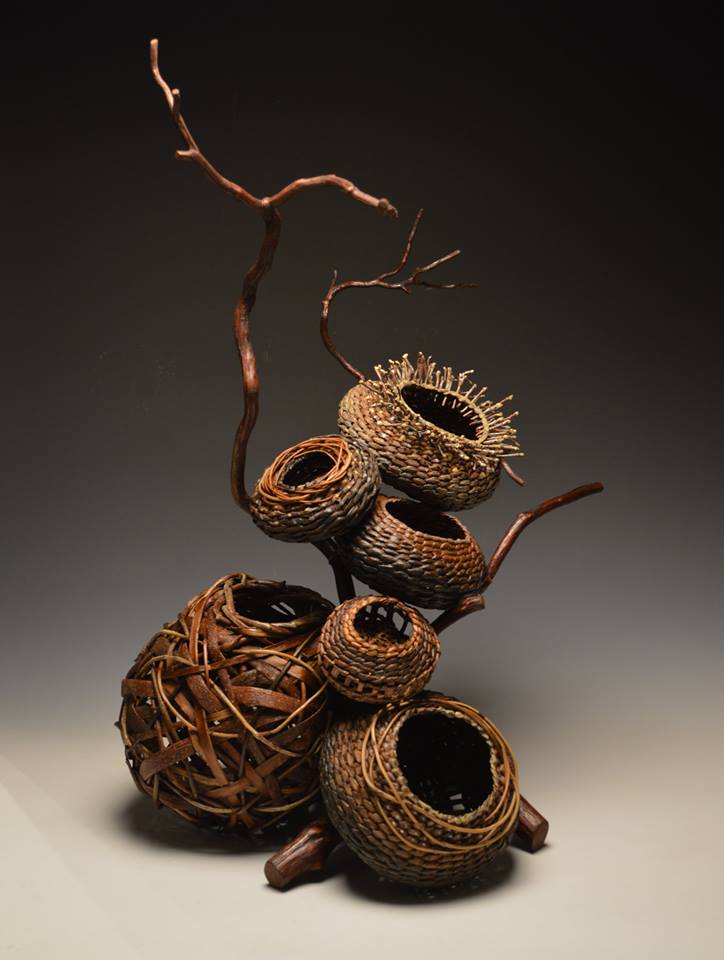
Random Basket Weaving Techniques
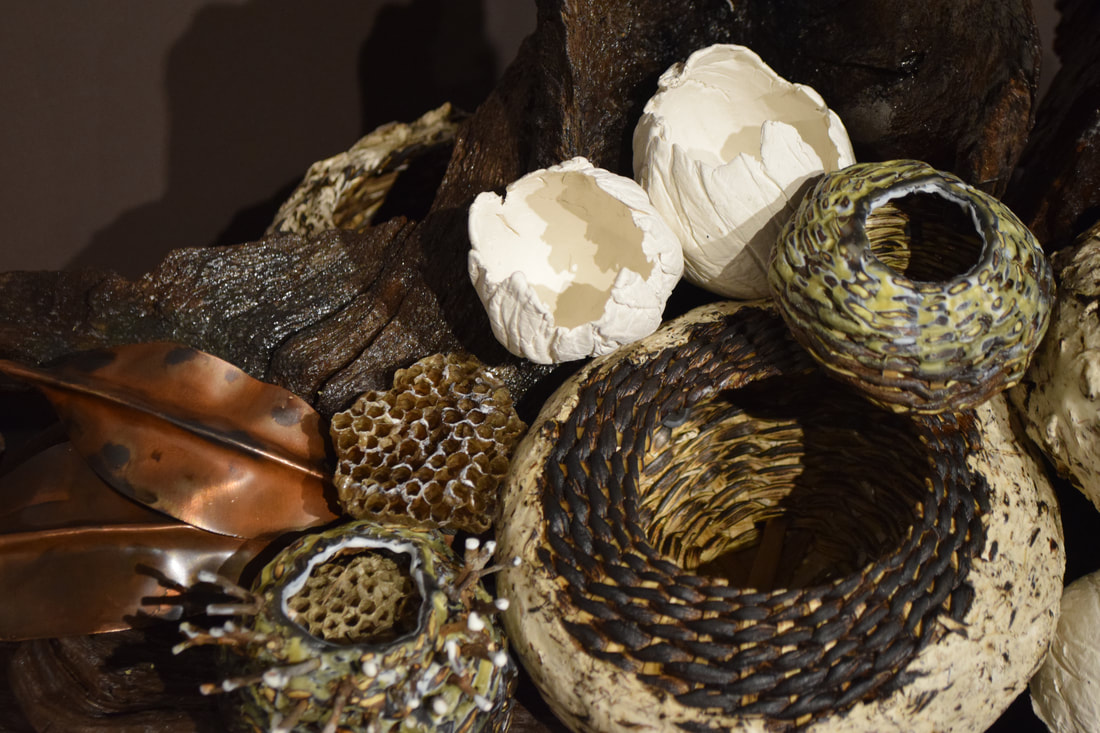
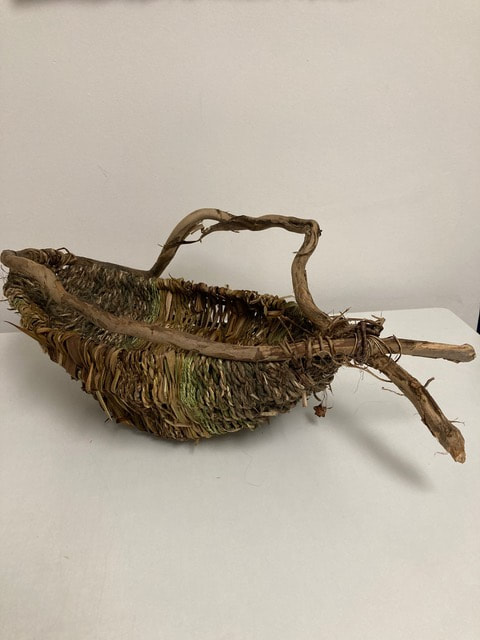
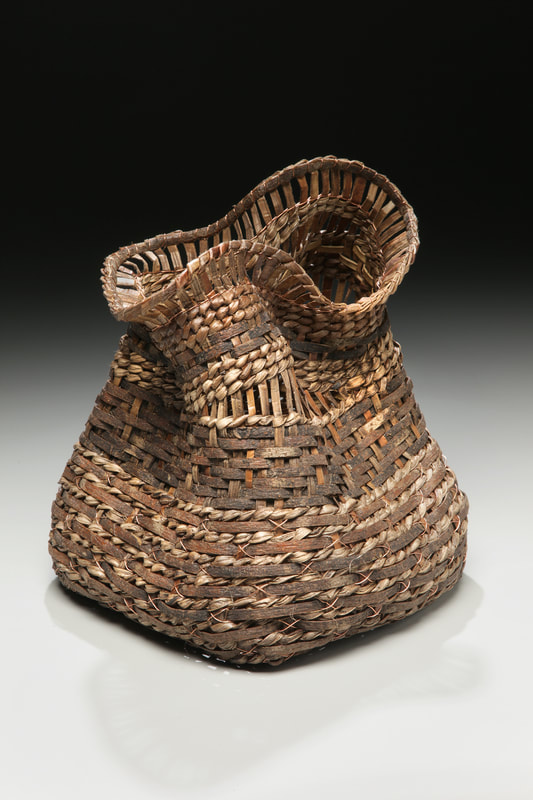
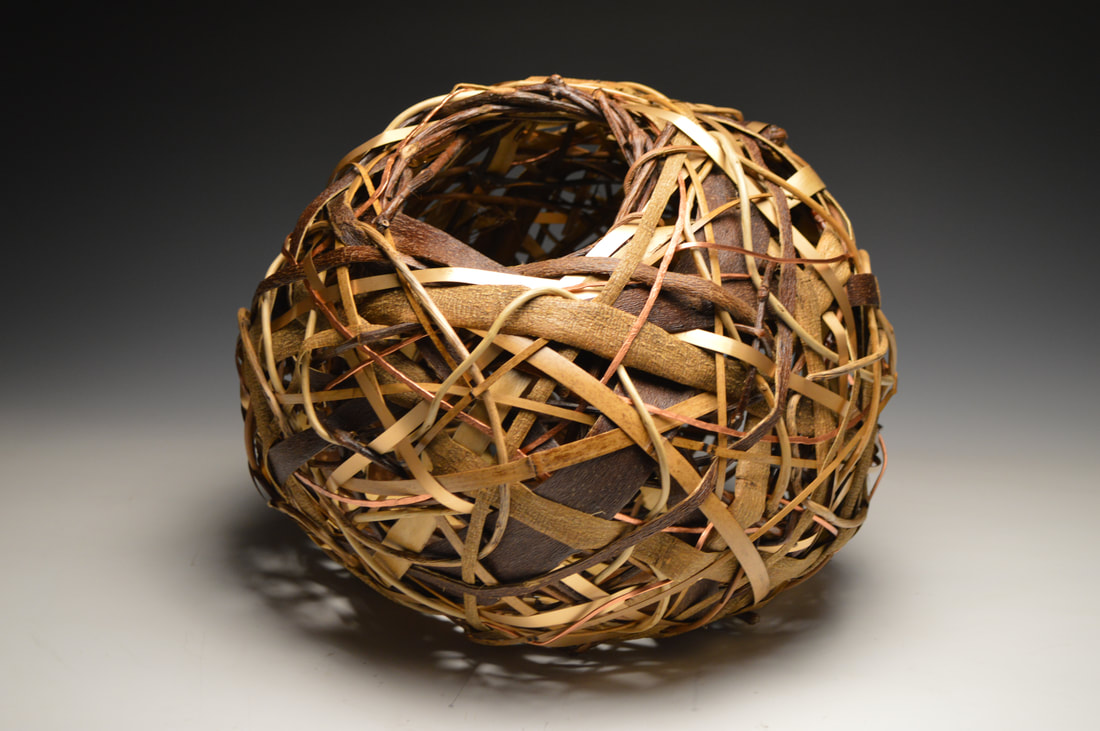
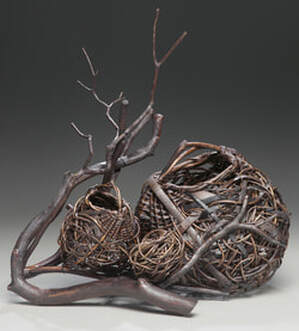
I really love random weaving because it's the closest basket weaving technique to the forms and processes we see in nature used in bird nests. Although it is random, there's definitely a process to making it look that way. In particular, I start with creating a frame out of rigid materials (usually grapevine) and then layering in flat pieces of bark, followed by smaller, more flexible material like wisteria and bittersweet, finishing with fine layers of metal and honeysuckle vines. I also enjoy random weaving over the top of twilled and twined baskets for a beautiful layered effect, reminiscent of Japanese ikebana baskets. Here's some examples of my work below.
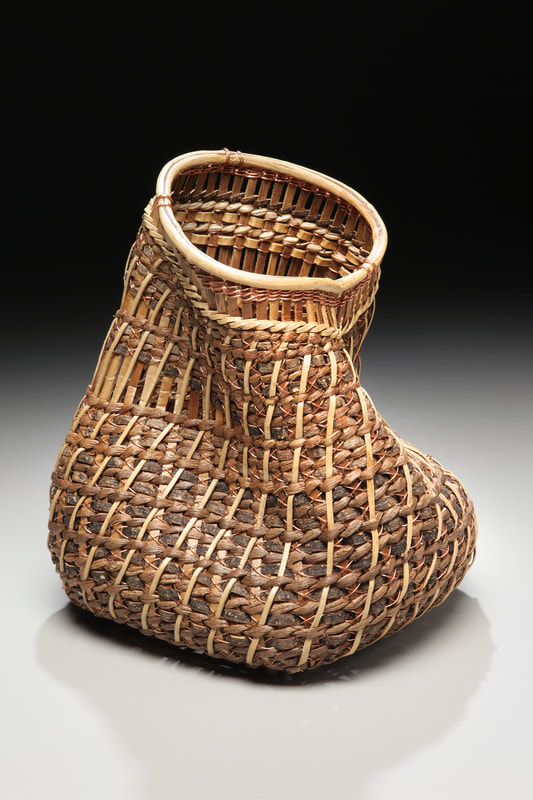
Rib Basket Weaving Techniques
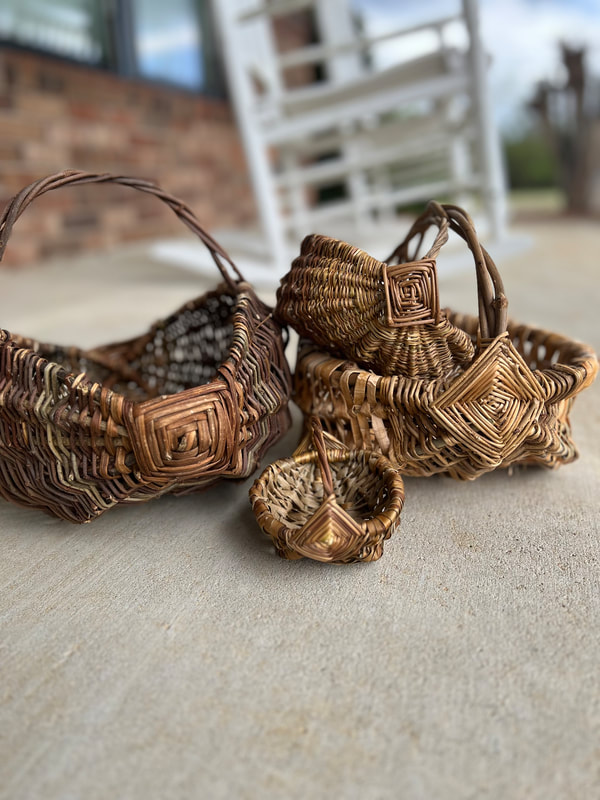
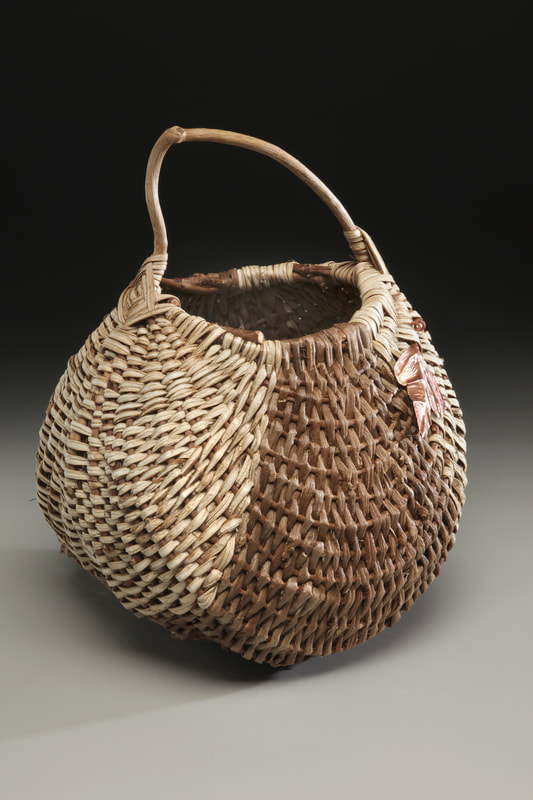
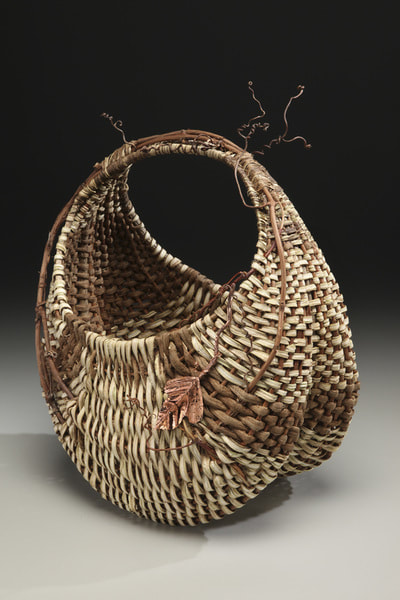
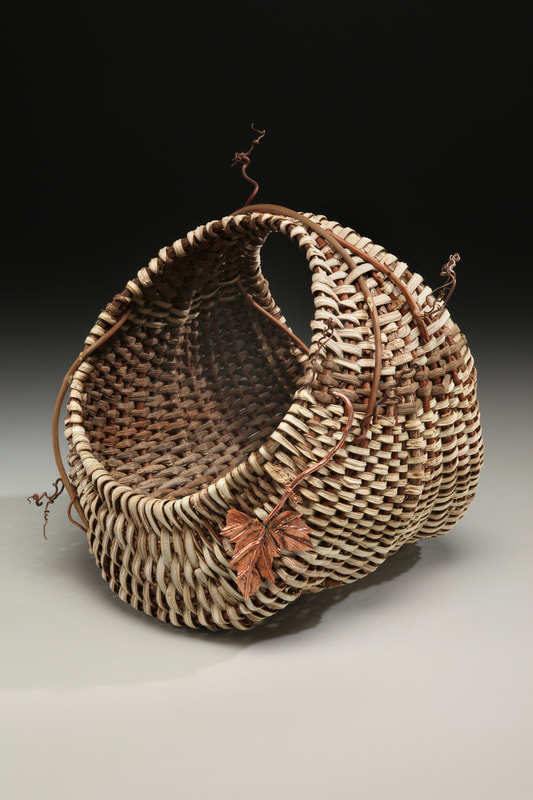
Last but not least is the basket weaving technique that I actually started with over 30 years ago, and that's rib basketry. When I started making baskets in college, it was after experimenting with kudzu vine at a summer camp I was working at and then finding a book on basketry shortly after arriving back at college that fall. The book covered a variety of weaving techniques, but rib baskets is where I started. I soon found the construction of these traditional forms almost addictive and spent every free moment harvesting and making. Here's some examples of traditional rib baskets (with an organic flair) I've created over the years. 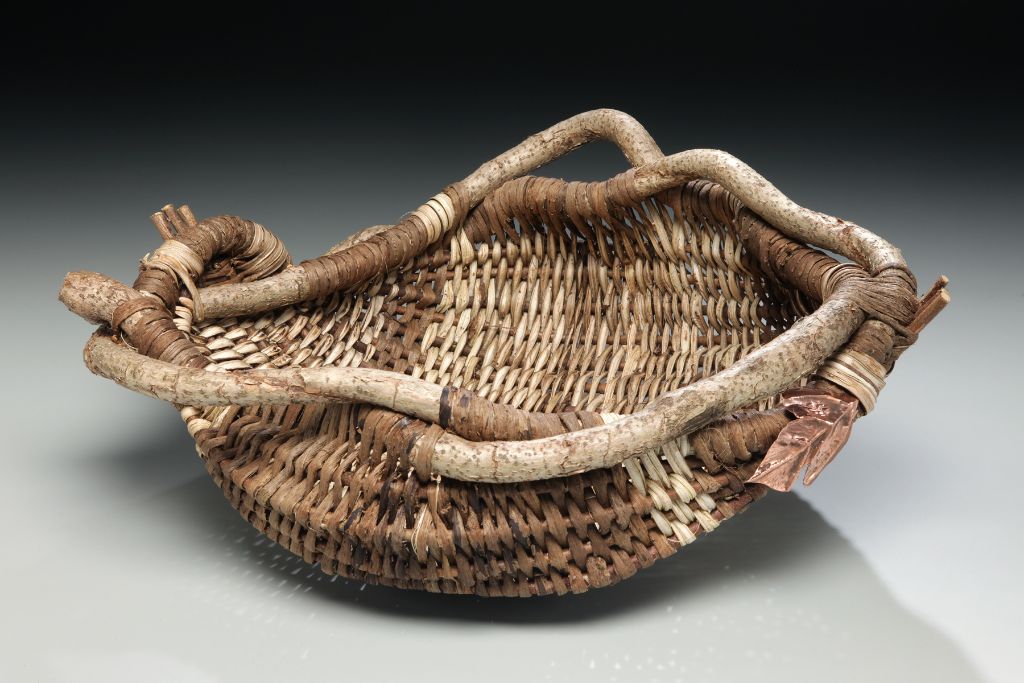
I hope these baskets inspire you to start trying these basket weaving techniques yourself. As you get started, be sure to download my free PDF, 7 Tips for Making Baskets with Natural Materials.
Also, if you're looking for a full immersion into the world of basket weaving with natural materials, consider my online basket weaving classes and community, available right now on-demand. Each of my classes includes hours of instruction and introduces 3-4 different basket designs along with a basket pattern and a video tutorials with detailed instructional material to guide you through the process. Whether you're a beginner or have some experience in basket weaving, my online basket weaving classes offer a comprehensive learning experience that covers foundational techniques and allows you to progress at your own pace. Feel free to start with basket one and weave all twelve to truly immerse yourself in this craft. Happy weaving! Additional Common Basket Weaving Technique Questions
Sustainability and Environmental Impact of Using Natural Basket Weaving Materials The art of basket weaving, deeply rooted in various cultures worldwide, has historically employed natural materials sourced from the local environment. The sustainability and environmental impact of using these materials in basket weaving are multifaceted, encompassing both ecological and socio-economic aspects. Natural materials used in basket weaving, such as grasses, vines, barks, and reeds, are typically renewable resources. Their use supports the principle of sustainability, as these materials can be harvested without causing long-term harm to the environment. For instance, willow, a popular basketry material, can be cut and will regrow from the same root system, making it a sustainable choice. Similarly, materials like bamboo, seagrass, and rattan grow quickly and can be harvested frequently. However, sustainability in basket weaving is not just about the renewability of resources. It also involves responsible harvesting practices. Overharvesting can lead to depletion of natural stocks, habitat destruction, and biodiversity loss. Therefore, weavers and suppliers need to practice and support sustainable harvesting methods. This includes understanding the growth cycles of plants, taking only what is needed, and leaving enough behind for future regeneration. The use of natural materials in basketry also has a minimal carbon footprint compared to synthetic materials. These materials are biodegradable, reducing waste and pollution when baskets reach the end of their life cycle. This contrasts sharply with plastic or metal materials, which can be environmentally damaging both in production and disposal. Furthermore, the use of natural materials in basket weaving carries socio-economic implications, especially in communities where basketry is an integral part of cultural heritage. It provides a source of income for artisans and helps in preserving traditional skills and knowledge. These socio-economic benefits, however, must be balanced with environmental considerations to ensure that these practices are sustainable in the long term. The environmental impact of basket weaving also extends to the dyeing process. Natural dyes, derived from plants, minerals, and other organic sources, are more environmentally friendly than synthetic dyes, which often contain harmful chemicals. Using natural dyes aligns with the ethos of sustainability, further minimizing the ecological footprint of the basket weaving process. In conclusion, the use of natural materials in basket weaving offers a sustainable alternative to synthetic materials, aligning with the principles of environmental stewardship and conservation. However, its sustainability hinges on responsible harvesting practices, community involvement, and an understanding of the ecological balance. As consumers and practitioners, fostering an awareness of these aspects is crucial in ensuring that the art of basket weaving continues to be an environmentally responsible and culturally enriching practice. 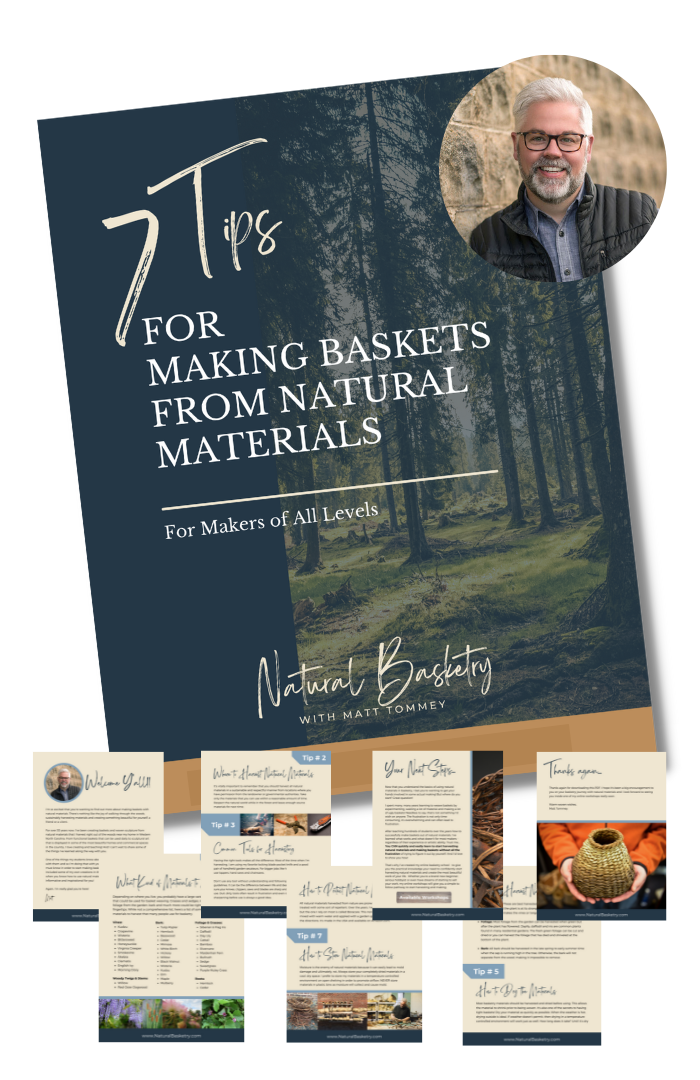 For years now, I've been asked by my students and followers alike to put together a simple guide for using natural basket weaving materials. Things like where and when to harvest, how to protect and store basket weaving materials and even common tools used in the process of making a basket.
Well, I finally did it! And you can download it for free right here: http://www.matttommey.com/basket-weaving-classes.html Let me know what you think in the comments below!
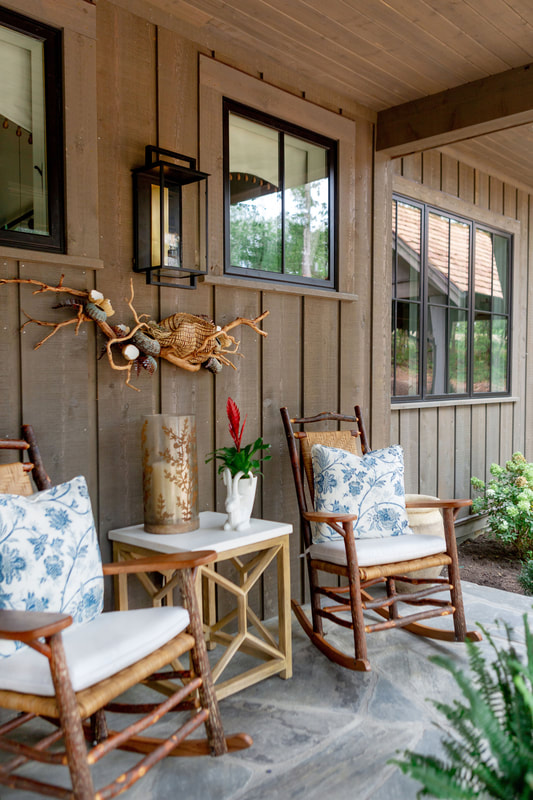
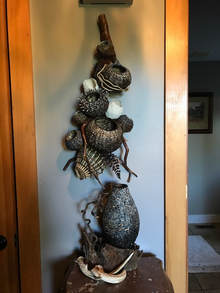
I was privileged this year to be asked again for a sculptural work to be featured in the Cashiers Designer Showhouse to benefit the Cashiers Historical Society. My piece was featured on the front porch of this modern rustic luxury mountain cottage in Silver Run Reserve. The porch was designed by Ann Sherrill, owner and lead designer at Rusticks in Cashiers and it was a show stopper to be sure!
I love creating special pieces like this one because they work both indoors or on a covered porch like this one. It's a truly versatile piece that brings the whimsy and beauty of nature into the living environment. This beauty is now available! 50” x 25” wall hanging perfect for interiors or a fully covered porch. $3,295. Complimentary delivery and installation for WNC residents. Email me for purchase inquiries. About the Cashiers Designer Show House "Sprawling across nearly 300 acres of natural beauty and adjoining the Nantahala National Forest, lies Silver Run Reserve, the location of the 2020 Cashiers Designer Showhouse (CDS). Silver Run was originally assembled by the civic-minded Neely family as a private family estate nearly 40 years ago. Located within the prestigious southern corridor of Cashiers, Silver Run is in the midst of a revival as it is being transformed into a private, low-density, wonderfully amenitized mountain community. The 2020 Showhouse is a 3,000-square-foot Mountain Modern Cottage, custom-designed by the renowned Meyer Greeson Paullin Benson firm and built by Cashiers’ own Harris Custom Builders. With beautiful mountain and wooded views, and close to the center of the community and The Lodge, the Showhouse is surrounded by tranquility and beauty. Leading local, regional, and national interior designers will grace one of Cashiers' most storied properties with a collective aesthetic vision for a once-in-a-lifetime Showhouse. The Cashiers Designer Showhouse is the Cashiers Historical Society's signature fundraising event. In partnership with Atlanta Homes & Lifestyles, CDS raises vital funds to support our mission and cultural programming." - CashiersHistoricalSociety.org  I'm excited to announce the launch of "The Thriving Christian Artist" podcast for artists who want to bust through roadblocks that have held them back for years, create the art they love and live the life the they know God created them to live as an artist in His Kingdom.
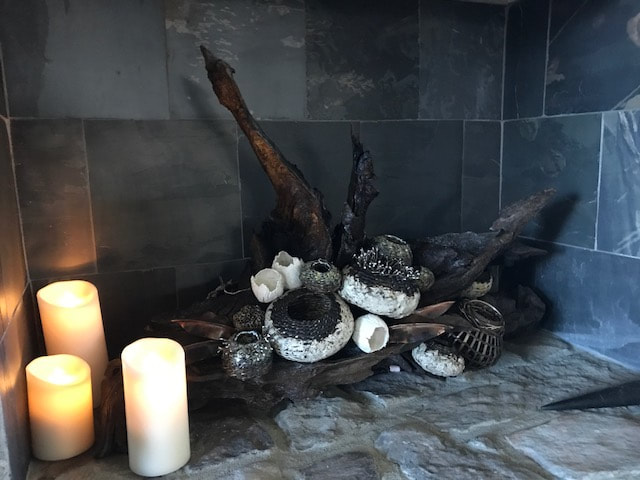
During each season of the podcast, I'll be sharing encouraging teaching and inspiration from my own journey as an artist plus interviews with both emerging and established artists in every creative medium who are thriving artistically, spiritually and in their business. You can listen, subscribe and review my podcast via iTunes, Stitcher, GooglePlay or my website www.MattTommeyMentoring.com/podcast After hosting a local garden club at my studio earlier this spring for a program centered around my sculptural work, one of the members asked me to create a special piece for her home. This was a new home for her and completely different that any other aesthetic she'd ever employed within her design background. The space features cool, calm colors, modern lines and beautiful windows overlooking a spectacular garden. Enjoy! 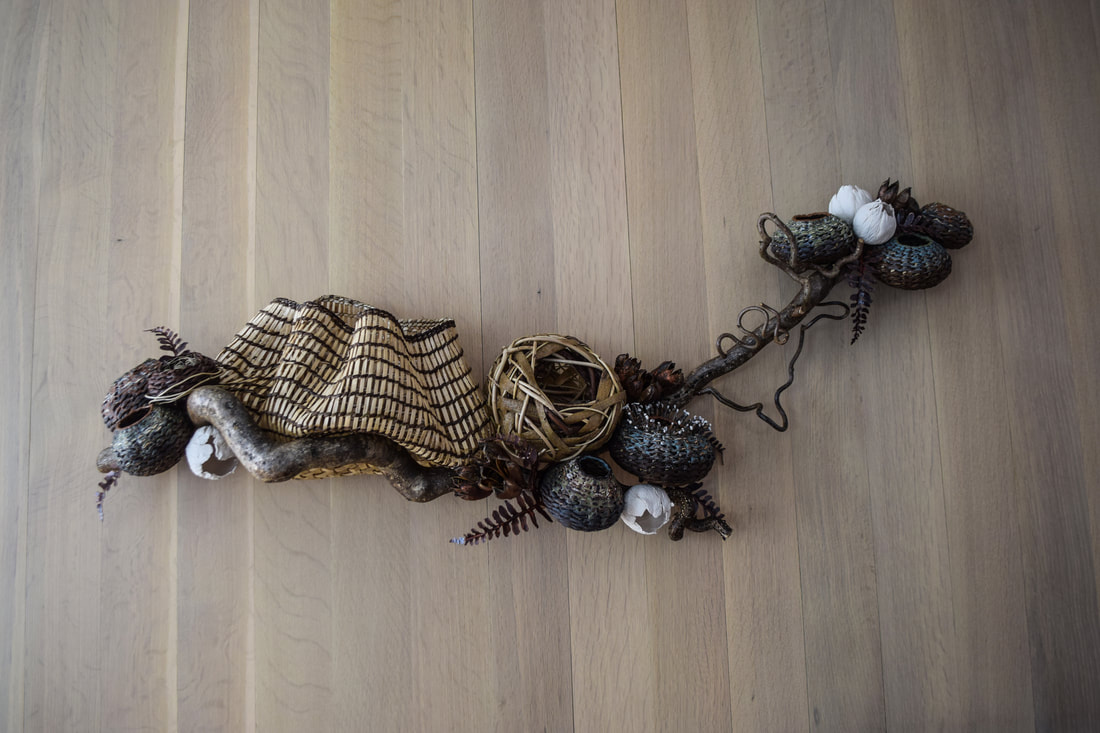  Vertical Sculpture for Sofa Table for a Luxury Mountain Home in The Cliffs at Walnut Cove11/14/2017
Dining Room Table Sculpture for French-Inspired Mountain Home in The Cliffs at Walnut Cove11/14/2017 "Working with Matt was a wonderful experience. I described what I wanted for my dining room table and he created exactly what I had envisioned. He didn’t mind my input at all as some artists do. I was absolutely thrilled with the result." ~ Nancy N. 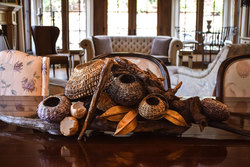 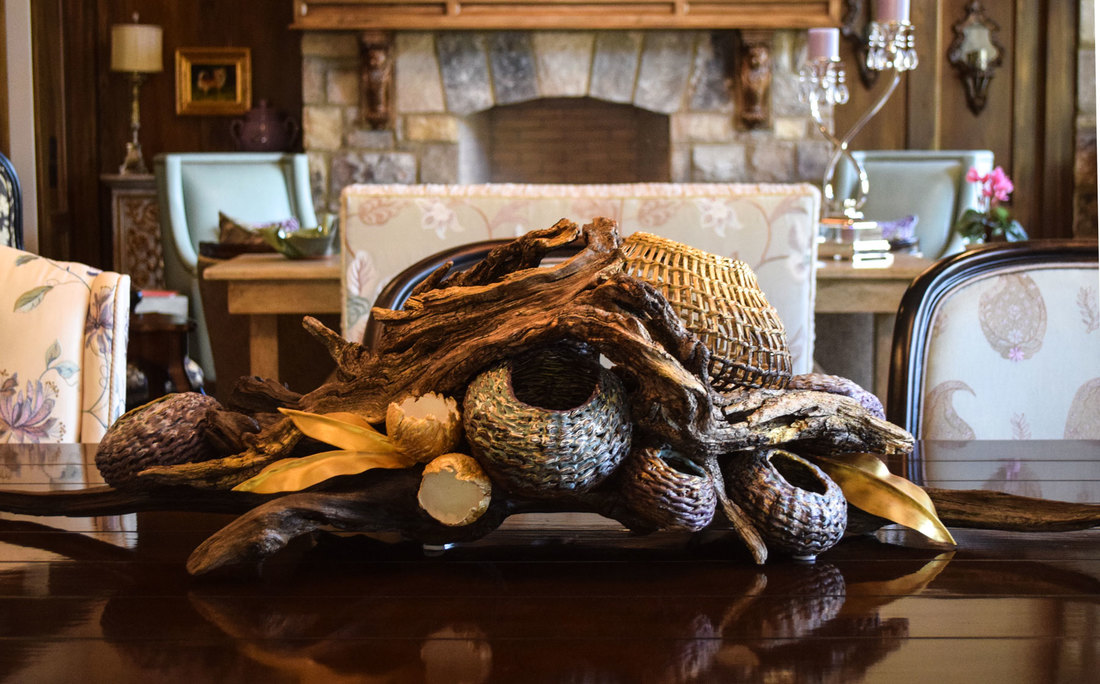
  |
AuthorMatt Tommey is a sculptural basketry artist and basketry teacher working in East Texas. His work is commissioned and collected around the country. Archives
March 2024
Categories |


 RSS Feed