|
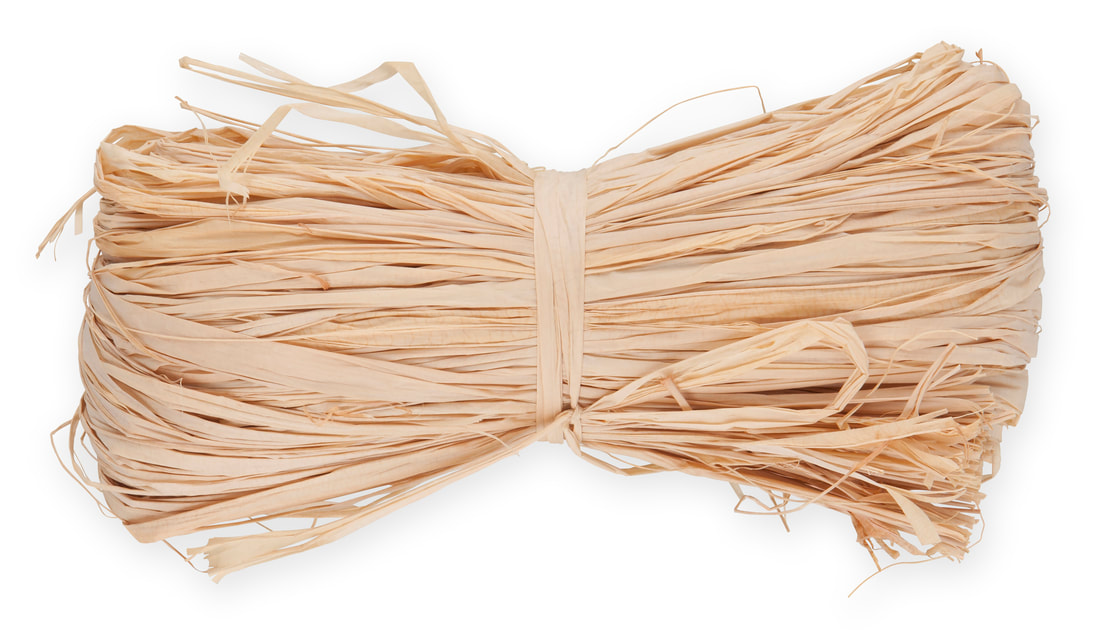
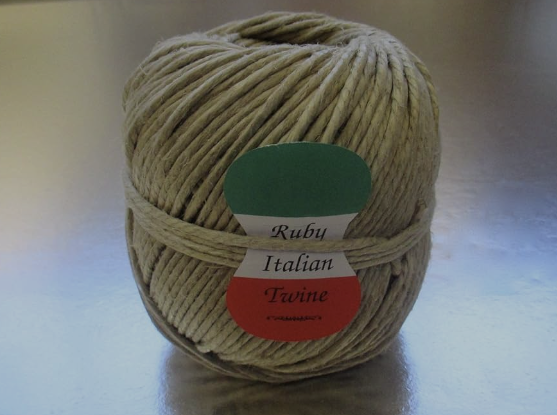
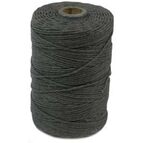
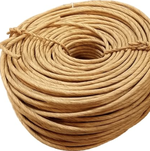
Over the years, a recurring question from my students, who come from all walks of life, has been about the alternatives to natural materials for weaving, especially when access to such resources is limited. It's a valid concern, particularly for those living in urban environments like apartments or condos, where the opportunity to grow and harvest natural materials is almost non-existent. Yet, the passion for weaving remains strong among them, leading to the inevitable question: How can a basket weaver continue their craft under these circumstances? The good news is that the world of basket weaving is as diverse as it is creative, offering numerous alternatives that maintain the essence of natural weaving without the need for foraging in the great outdoors. I've explored and experimented with various materials over the years and have found several "store-bought" options that not only emulate the look and feel of natural weaving materials but also add their unique touch to the craft. Here are three of my top picks that I often recommend:
In essence, the art of basket weaving doesn't have to be confined by the availability of natural materials. With a little creativity and exploration, the alternatives can provide not only a practical solution but also an opportunity to experiment and innovate within the craft. Whether you're nestled in a bustling city apartment or have limited access to natural resources, these materials ensure that your weaving journey continues unabated, bridging the gap between traditional craft and contemporary living. So, to all the basket weavers out there in less leafy locales, fret not—your craft can flourish with these wonderful alternatives at your fingertips.
8 Comments
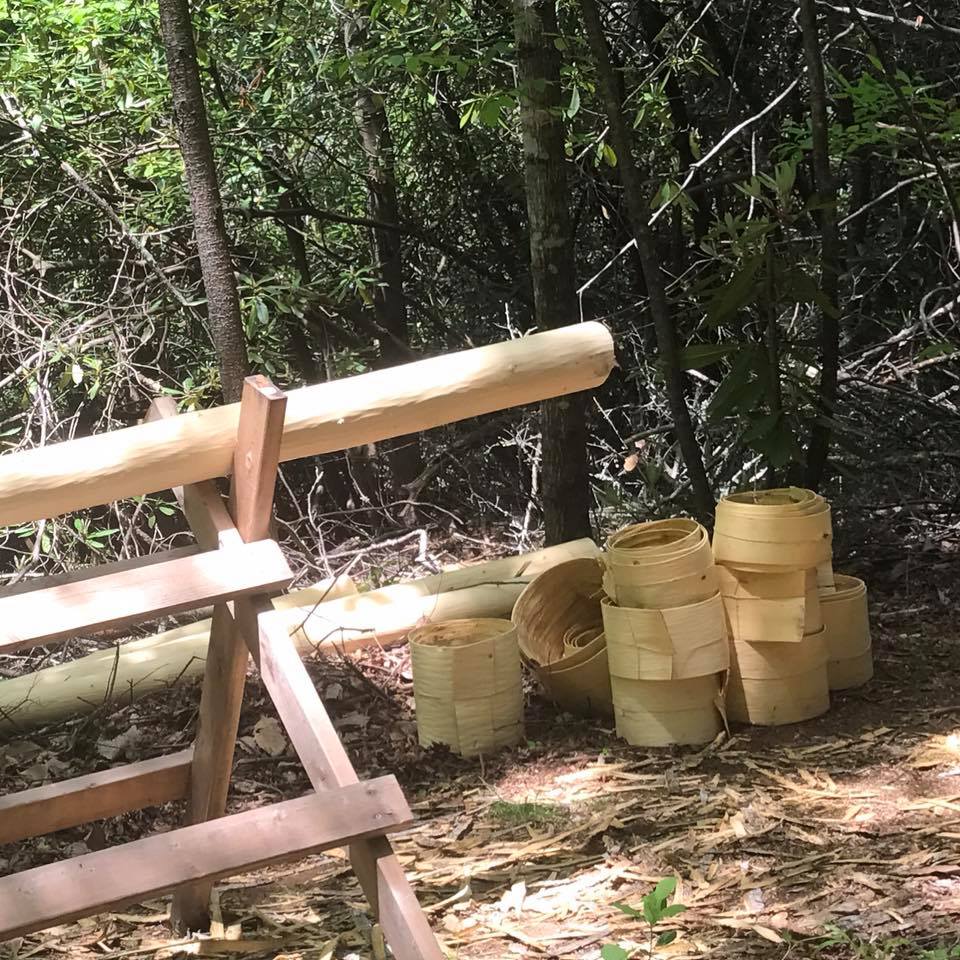
One of the things I like to do is harvest and prep material in batches. That is, instead of harvesting and prepping for a single project I harvest and prep a large batch of vines, bark, willow, etc.
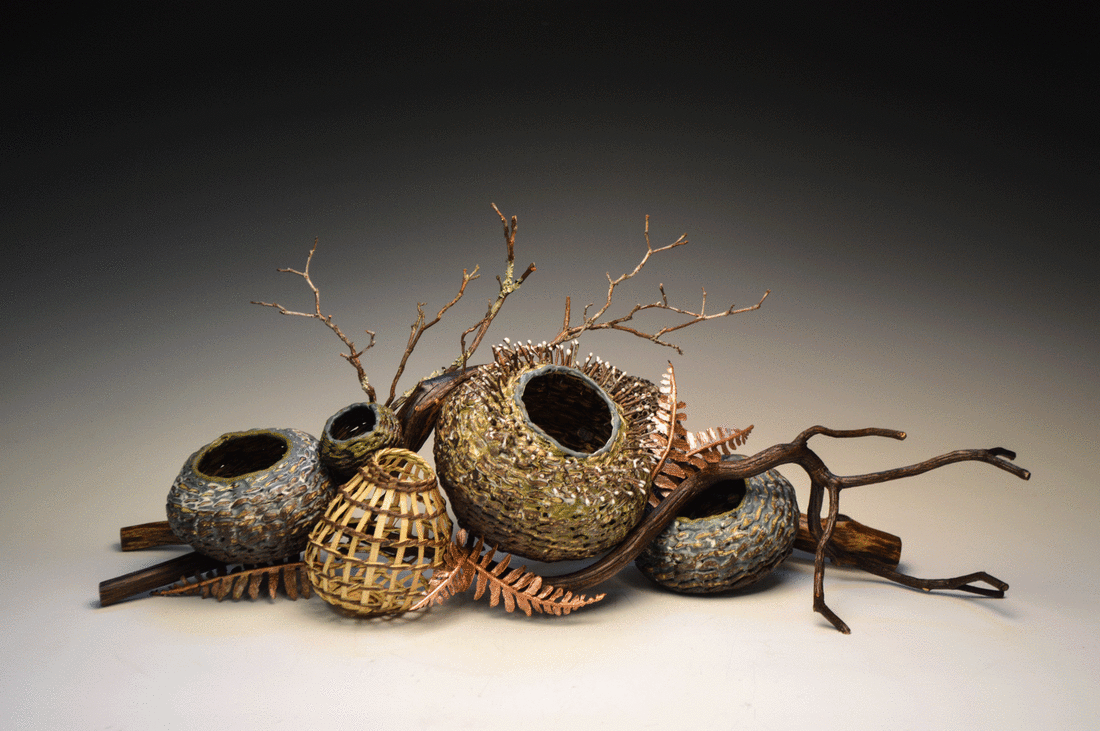
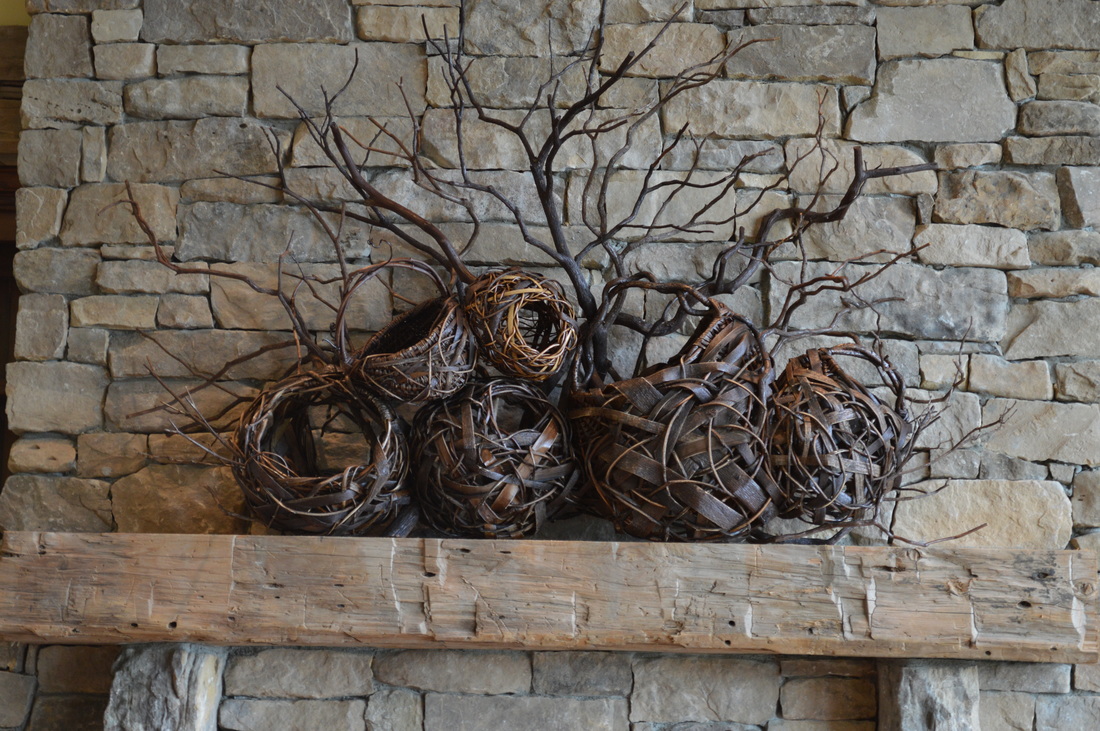
Today, after I finished weaving, I split tulip poplar bark for upcoming projects. It took several hours but was well worth it. Not everything is ready to weave when I am. Material prep is also a good way to shake up your energy too. When I feel uninspired but still want to be productive, material prep is my number one go-to activity.  What to do with Basket Weaving scraps??Over 30 years of weaving with natural materials, I've seen my share of scraps lying around the studio. And honestly, I've thrown a lot away over the years out of laziness. Which is crazy, considering how much time I've put into locating, harvesting and prepping this "gold"! But one of my studio assistants several years ago helped me get a vision for using my scraps better... especially bark scraps. Now, at the end of the day, I take my bark scraps and separate them into 3 main sizes - short, medium, and long - and place them in a little container I made out of... you guess it, scrap wood. Now, when I'm making smaller baskets (which I do a lot for my sculptural collections), I have a gracious plenty of materials perfect for the job. Anything that won't fit in this, I store in a big cardboard box and use it to refill this studio tabletop as needed. 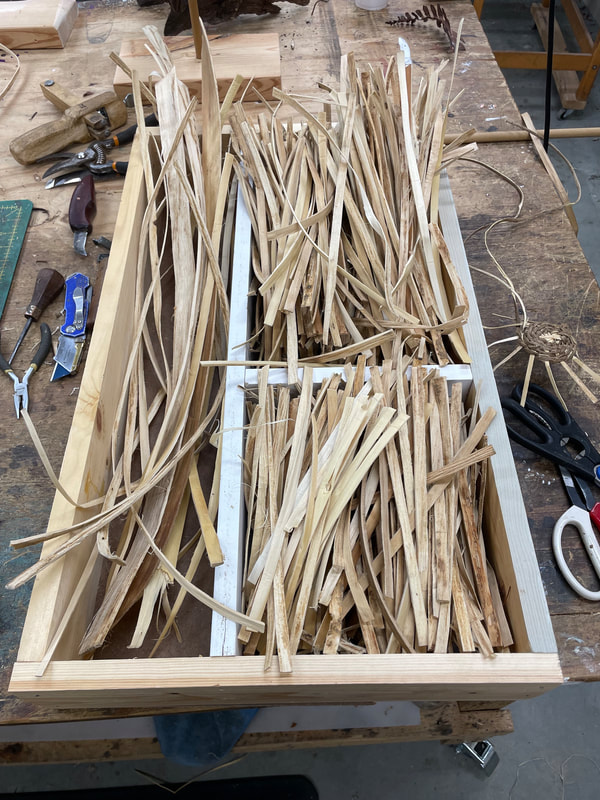 Mixing Bark and MetalEver since I have been weaving, I have tried weaving in new materials and trying new ideas with my sculptural baskets. Early on, I started using copper with my baskets and began to incorporate the material into my pieces in different ways. From copper fern and rhododendron leaves, to weaving in copper wire like in the video above, copper has allowed me to expand my work. Complementing the natural, woody fibers of vines and barks that are my primary weaving materials, copper adds a flash of color and smooth texture. Copper leaves bring in another aspect of nature to my sculptures. In the video above, I show you how I weave copper directly in with barks to create a piece like these below.  For more information on Natural Basketry, visit http://www.matttommey.com/basket-weaving-classes.html and download my free PDF called "7 Tips for Making Baskets with Natural Materials". Inside I'll tell you what materials are good for making baskets, when to harvest, how to store and protect them, and even common tools used in the harvesting process.
What is Grapevine?
Features of Grapevine:Due to the thick and woody bark, larger parts of grapevine have lots of texture. The wild grapevine itself grows up along existing vegetation by sending out narrow vines which coil around plants' branches and foliage to help support the vine. These tendrils appear in curls shooting out from the main parts of the grapevine. I love how these fit into the baskets because they extend out beyond the vine and are great interest points. Where to Find Grapevine:Grapevine runs rampant in deciduous forest throughout the South. You will find grapevine in most forests you visit if you're in the Southeast, as will you find it growing along roadsides or along fences. You will not have a difficult time finding grapevine near you, so likely it will be a great, free resource to harvest and weave! 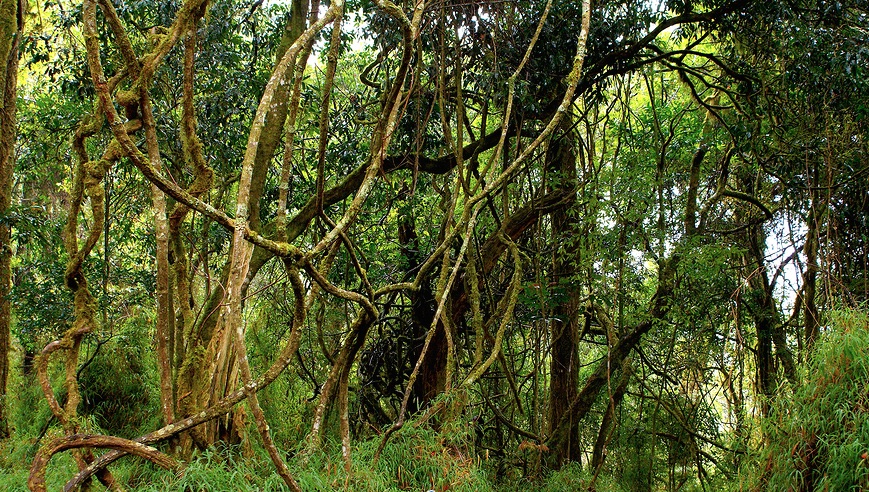 Weaving with Grapevine:Over the years, I have utilized a random weave technique. It is a great way to get cool shapes using a variety of materials, including grapevine. The random weave has no discernible pattern making the pieces truly one of a kind. The tendrils in grapevine also add cool details to the baskets as they protrude from the baskets themselves. Grapevine baskets are also well complemented by copper wire and branches mixed in along with the weaving. Check out more about my grapevine baskets here.  For more information on Natural Basketry, visit http://www.matttommey.com/basket-weaving-classes.html and download my free PDF called "7 Tips for Making Baskets with Natural Materials". Inside I'll tell you what materials are good for making baskets, when to harvest, how to store and protect them, and even common tools used in the harvesting process. 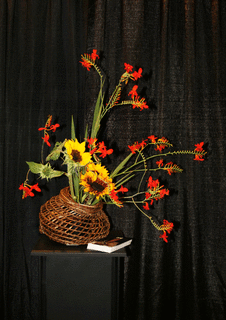 Recently I was honored to participate in the Ikebana International Regional Conference held here in Asheville, North Carolina. Having always loved Japanese basketry design and Ikebana, I hoped for a great experience.
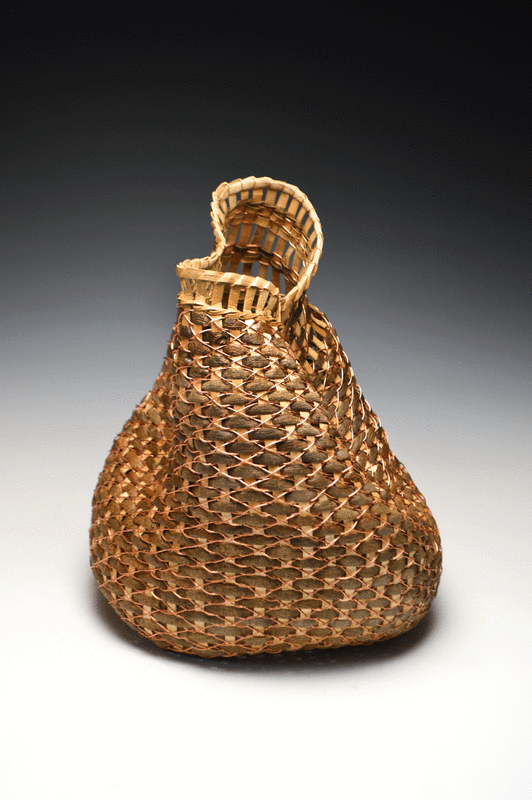
There were over 300 ikebana artists, instructors and enthusiests in attendance and the conference at the Renaissance Hotel downtown and I was one of 9 artists selected from Asheville's incredible creative community to provide containers suitable for Ikebana. During the one day I was at the conference, I was blown away by the wonderful reception to my work from artists around the world. They really GOT what I've been trying to do for 21 years, which is use basketry as a sculptural form, not just a functional object. Funny enough, their appreciation for the sculptural nature of my work was deepened by their desire to use my work functionally in their ikebana arrangements. I'm happy to say, I have many beautiful pieces now living all over the world! Additionally, because of the success of the conference, the Southern Highland Craft Guild, of which I am a member, had 10 Ikebana artists do a collaborative exhibit at our recent Craft Fair of the Southern Highlands this past July. The artists used guild members to provide ikebana containers for their incredible arrangements. I was honored to have Terri Ellis Todd, a renown ikebana instructor and artist select my work for her incredible piece, pictured above. If you are an ikebana artist, I'd encourage you to check out more of my work here on the Current Inventory page as you look for unique ikebana containers for your work. Many people have asked me over the years how I harvest the inner bark of tulip poplar trees for my hand woven baskets. So, instead of writing an article, I thought I'd try a video. Let me know what you think!  For more information on Natural Basketry, visit http://www.matttommey.com/basket-weaving-classes.html and download my free PDF called "7 Tips for Making Baskets with Natural Materials". Inside I'll tell you what materials are good for making baskets, when to harvest, how to store and protect them, and even common tools used in the harvesting process. 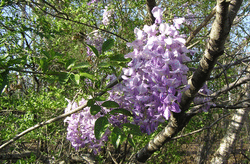 Wisteria is a great ornamental plant that can be trained and used for basketry. It’s runners have been known to run 50 feet or more when given an unobstructed area like a yard or wooded area nest to where it’s planted. Many people grow wisteria as a trellis plant and let the runners get very long each year and then harvest them at the end of the season (like honeysuckle, bougainvillea, confederate jasmine and other ornamental vines._ Harvest in the winter time as with other vines because the sap is down, although summertime harvesting for wisteria is not out of the questions, since most of the time it’s long, straight runners don’t have any leaves. For example, the place I get most of my wisteria for the year is a man’s house who lives close to me - his wisteria runners run under his deck and have none - ZERO - leaves in the summer. The runners grow about 20-40 feet in length and there are hundreds.  OK, so when you get them home, I’d recommend coiling and drying the vines. You can, however weave wisteria green because it’s such a woody vine, yet very flexible, there’s almost no shrinkage. If you want to boil it know that the bark will come off usually. HOWEVER, the bark, especially on the runners that are pencil to finger thickness is excellent for cordage and fine twining - kind of like honeysuckle bark but MUCH better. It’s actually akin more to kudzu bark, in that it stays together in one long strand much easier than does honeysuckle. 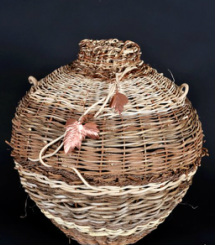 An early wisteria basket An early wisteria basket You can twine with wisteria very nicely or you can use it in random weaving which is what I use it for alot. The larger wisteria you can split like kudzu, by taking a knife to the end and making a vertical incision down the center of the vine. Pull evenly and hold the vine between your knees as you split. If it starts getting off center, simply pull to the fatter side as you split until it evens back up OR just re-clip it again with your sharp garden clippers or knife. Wisteria without the bark dries a very nice ivory white and very smooth. With the bark, it’s a beige color. Of you’re planning to plant Wisteria around your house or condo, just make sure you’re ready to keep an eye on it during the growing months and train it where you want it to go. Otherwise you will have a beast on your hands - and PLENTY of weaving material.  7 Tips for Making Baskets from Natural Materials 7 Tips for Making Baskets from Natural Materials For more information on Natural Basketry, visit http://www.matttommey.com/basket-weaving-classes.html and download my free PDF called "7 Tips for Making Baskets with Natural Materials".
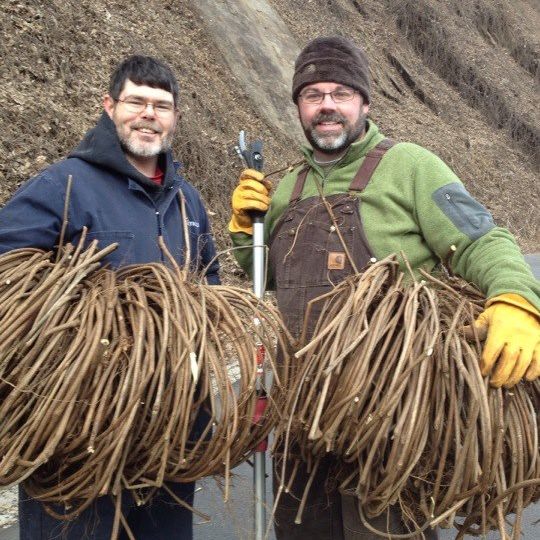
Inside I'll tell you what materials are good for making baskets, when to harvest, how to store and protect them, and even common tools used in the harvesting process. 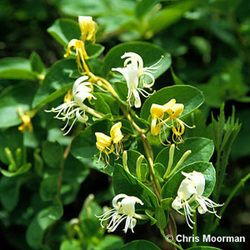 Japanese Honeysuckle in Bloom Japanese Honeysuckle in Bloom I came to honeysuckle vine later in my basketry career. Since I always had such a love for and understanding of kudzu, rarely did I ever look for other natural materials to use. However, when I found honeysuckle vines, that changed. In my book it can never replace kudzu, but it sure is a wonderful material to weave with. The trick with honeysuckle, as will all natural materials, is understanding what it will and won't do, it's strengths and weaknesses. There are those folks out there that use honeysuckle almost exclusively for their weaver. The Cherokee's still use a lot of native and Japanese honeysuckle in their work in random weave, twining, twill and rib basketry. Most of what I've used it for over the years tends to be as an additional sculptural element. The reason why is that the make up of the vine lends itself to being celebrated as a special feature, not just a normal weaver. 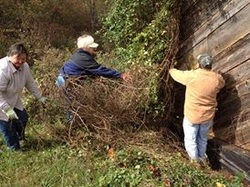 Harvesting Honeysuckle Vines Harvesting Honeysuckle Vines As a young vine, the honeysuckle vine runners can be very, very long - 20ft or more - and very pliable. The vine has a fine, paper-like bark on it that is a caramel brown color once it's matured a bit. When very young, it will be green. As the vine matures over years, it usually becomes crooked, very woody and has a lot of twists and turns. Usually you'll find honeysuckle growing in wet, bottom areas like around creeks, marshes or rivers. You can also find honeysuckle growing on barns, buildings or in gardens. There are lots of different varieties that can be cultivated for home enjoyment within your own basketry garden. "Identification: Japanese Honeysuckle is an evergreen woody vine that may reach 80 feet in length. The leaves are opposite and elliptically shaped. The tan vine may reach a thickness of 2 inches in diameter. Fragrant, white or pale yellow tubular flowers appear in April to August. Spherical, black glossy berries containing 2 to 3 seeds mature from June to March. Ecology: Japanese Honeysuckle is a common invasive plant in the Southeast. The shade tolerant vine occurs along field edges, right-of-ways, under dense canopies, and high in canopies. This invasive vine colonizes by prolific vine growth and seeds that are spread by birds" from http://www.ncsu.edu 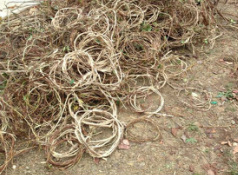 Honeysuckle Vine Coils After Harvesting Honeysuckle Vine Coils After Harvesting Like all vines, I recommend harvesting honeysuckle vine in the fall and winter months. That way they are less likely to snap when pulling them. You can always remember when pulling vines "Sappy Snappy". That basically means that when the sap is high, in the spring and summer months, vines are more likely to break when being harvested. Also, winter is a lot easier to harvest vines because there are very few bugs, no critters are out and all the leaves are gone. Once you get your vines, you can store them in a cool, dry place until you're ready to use them. Just like the image here from one of my recent basket weaving classes, I recommend that you coil the vines into loose coils. However, be sure that they are small enough to fit in whatever pot you're going to use to boil them when you're ready to weave. Which brings me to the next step. 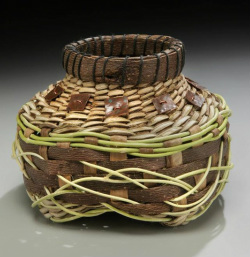 Honeysuckle Vine, Kudzu and Bark Honeysuckle Vine, Kudzu and Bark Whenever you're using honeysuckle vine, you'll want to boil it for 3 reasons, pliability, bugs and bark. Obviously, boiling makes the vines much more pliable and easy to use when weaving. Also, any bugs that are on the vines or in them for that matter will be nixed when you boil the vines. Lastly, boiling the vines will loosen up the bark so you can remove it from the vines. You'll want to boil honeysuckle vines for about 20-30 minutes or so - until they are rubbery flexible. (NOTE: Honeysuckle has a real papery outer bark that comes off pretty easily. It also has another layer of bark that's usually pretty tightly attached to the vine. Get that completely off too. It can be a pain, but once you get a clean vine, it will turn a beautiful ivory white.) With small vines, you can literally put on some 'gripper gloves' (you know the garden gloves with gripper on the palms and fingers), pinch the vine and pull the bark right off. With larger vines, I recommend you go all the way down the vine twisting the wet bark on the vine. Then once it's totally loosened up peel it off. If you're a papermaker, this bark is fabulous for natural fiber paper making. You can also use the long strands of honeysuckle bark for twining or making cordage. Now that you have your honeysuckle all boiled and cleaned you'll probably be ready for a nap! Welcome to weaving with natural materials :) However, now the fun begins. I usually separate my prepared materials by size. Large, gnarly pieces are great for handles, long straight pieces for weaving and then medium crooked pieces for weaving or as an architectural element on other baskets. Whatever it is, you'll want to weave while the vines are wet and pliable. Hope this article helps you feel confident in going out and harvesting your own honeysuckle vines!
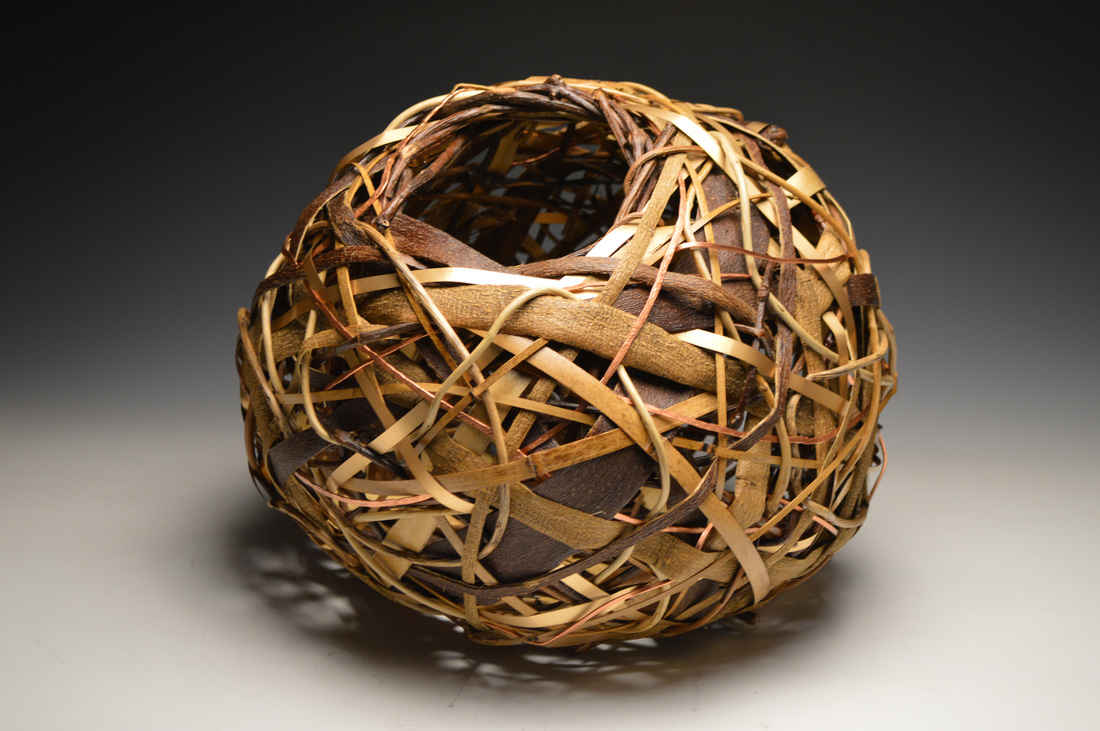
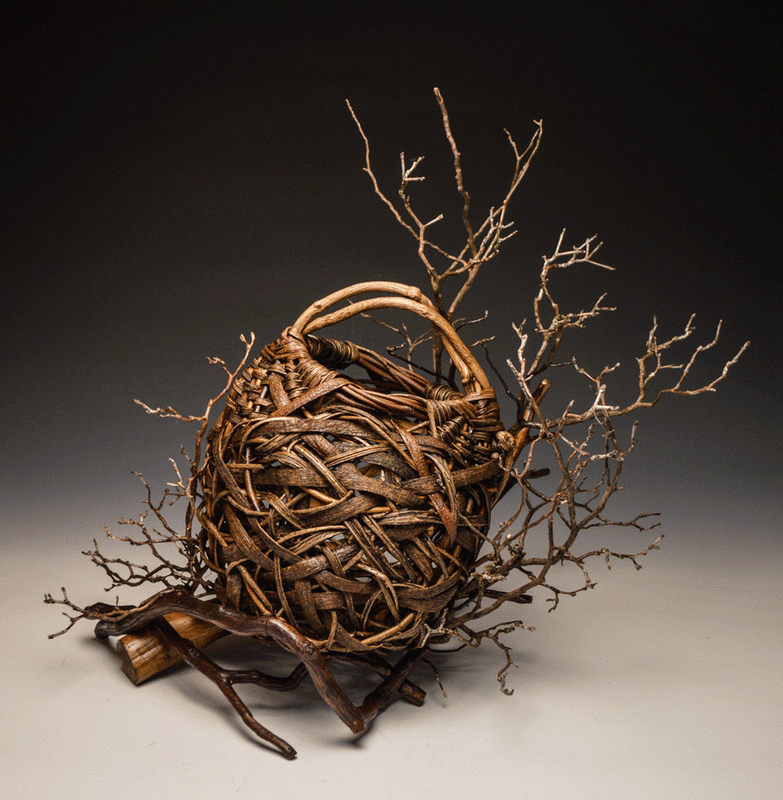
 As I've said many times, all kudzu is not created equal. Over the years I've learned that there are 2 very distinct types of vines. One I call the "climbers" and the other I call the "runners". At the end of the day, yes they are the same vine however depending on how and where they are growing the vines have very different properties. At a very basic level, climbers are large, rough and woody whereas the runners are smaller, smooth and flexible. In this article, I'll be talking about how use the runners in basketry, but you can read about the climbers here in my earlier article "How to Weave a Basket with Kudzu: Climbers". Ok, so if you know me and anything about my work, you know that I'm a big, big fan of runners. One of the main reasons is because it took me 15 years to really figure out how to use them most effectively. Another reason is simply that I believe the kudzu runners are one of the best by far natural weaving material we have available to us in the southeastern US that hardly anyone uses. Over 20 years ago when I started my basketry adventure I was immediately drawn the the runners. For me, it was a no brainer. you'd walk into the woods behind the curtains of large hanging ropes of kudzu and on the ground, literally like a spider web, were these long, pristine, smooth vines with no leaves. I can remember the first time I went out there to harvest this material thinking to myself "I have absolutely hit the jackpot! Now what in the world do I do with this?" Well, unfortunately, I didn't know what to do with it and I started following the traditional thoughts on kudzu which was to harvest green, use while fresh either whole or split and be happy with mediocre results because "that's just the way kudzu is." Literally, every book I read on natural materials basketry either said what I just said, don't use it because it's no good or whatever you do, don't use the runners. Long story short, i believed them and it set me back a long time.  One of my early, loose Kudzu rib baskets One of my early, loose Kudzu rib baskets When I started weaving, I started with traditional rib basketry forms and white oak and willow were the vision of what I was trying to create, only with kudzu. Honestly, I was very frustrated by the kudzu because I was using it like everyone said to use it yet getting these really mediocre results that didn't look like the quality I wanted to create. I eventually came to accept it, but I was never satisfied with my work. About 12-15 years into my journey, I had harvested a bunch of kudzu in the fall, as was my tradition and was weaving away. Time got away from me and I let some of my runners get dry. Too dry to split or weave. Instead of throwing them out that day, I decided to throw them in a bucket of water over night, just to see what would happen. Lo and behold (can you tell I'm from the south yet?) I went out there the next morning and I was able to split the kudzu. Not only that, but when I wove the basket, it stayed exactly as I had woven it. No shrinkage, no warping, no nothing. Just perfection. It was as if the lights came on inside my head and said "Eureka, Kudzu!" I started experimenting feverishly and found that if I split the kudzu and let it dry, completely before I used it that I got tremendously different results. So that's what I started doing; harvesting, splitting, coiling, drying and then rehydrating in hot tap water for about 15-20 minutes to prepare to weave. It changed my work to drastically and opened up a whole new world of possibilities for me. As I began to get more comfortable with the new material, I found that I could now go smaller and finer with the material and thus the weaving. My rib baskets got crazy tight and then I started getting interested in twining after being encouraged by a mentor of mine, Michael Davis. He said "Matt, learn to twine. Twining will change your life." And it did. 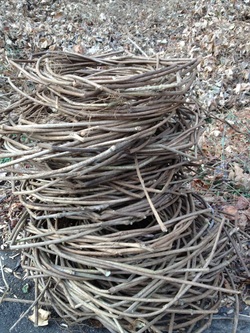 Whole Kudzu runners Whole Kudzu runners Using Kudzu Runners in Basketry Kudzu runners are best harvested in the winter time, after the first freeze and frost. Around this time of year, the leaves of the kudzu will fall off and the vines will be much easier to access. Not only that, but the bark, as with all vines and trees, will tighten up around the plant in order to conserve energy for the winter. This is great for kudzu because when you split it or use it whole, the bark will stay on. Otherwise, if you harvest kudzu in the summer time, the bark will want to separate from the vine. That's great if you're wanting to use the vine and bark separately as I described in my earlier article "How to Weave a Basket with Kudzu: Climbers" but not so much if you're wanting to keep the bark on. When you harvest the runners, you'll get a pile just like this image here on the left. Just to give you an idea, harvesting that much kudzu would take me about 2-3 hours in a good patch and I'm pretty fast. 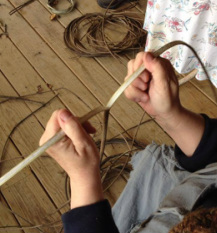 Splitting a Kudzu Runner Splitting a Kudzu Runner Once you harvest the runners, you have 2 options: to split or leave whole. 95% of the time, I'm going to go ahead and split them because that's what most of my work calls for. Either in rib basketry or in my sculptural twining, I'm working very finely and so I prefer to have the vines split so that after they dry and I rehydrate them, I can size them appropriately. To split the kudzu vine, simply make a vertical incision at one end of the vine and pull apart evenly all the way down. As you're pulling, the best thing to do is hold the kudzu in between your knees so you can manage the twisting and turning of the vine as you split. If you hit a snag, or it becomes uneven just recut with your knife or scissors. You can however leave them whole. If I'm going to do that, I would typically leave my smaller runners for that application. I use whole runners for doing things like bird houses or larger projects, especially if I know they are going to be used outside. Split kudzu runners tend to mold and decay very quickly if left outside, even on a porch, because of the moisture. However, whole kudzu holds up very nicely over many years in a covered outdoor application. Whether split or whole, you should make sure to store your kudzu runners in a dry place, free from moisture, mold and direct sunlight. This will ensure that the runners will dry evenly and be ready for you once the time come to prepare them for weaving. 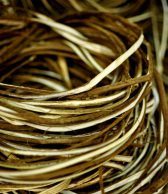 Split kudzu runners Split kudzu runners The main difference with leaving the runners whole or splitting them is in how you prepare them for weaving. Split runners can be easily soaked in hot tap water for about 20 minutes. Don't ever boil split kudzu unless you want to take the pith out. Boiling split kudzu causes the pith to turn into a translucent mush. It can be very easily scraped out with a spoon, leaving only the kudzu fiber and bark. This is very nice for fine twining work.
With whole vines, you can boil them but just enough to get them flexible for weaving. Don't ask me for a specific time, because there isn't one. Its just trial and error, mostly because of the size and differentiation of each batch of kudzu runners you'll be using. I regularly use kudzu runners in almost all of my work and take it down to as small as 1/16th of an inch for fine twining. As you get to know this phenomenal material, you'll realize that the possibilities are endless. |
AuthorMatt Tommey is a leader in the contemporary basketry movement and has been a maker for over 25 years. The focus of his work centers around the use of southern invasive plant species in basketry. He has served on the board of directors for the National Basketry Organization and taught at Arrowmont, the John C. Campbell Folk School and other locations both in the US and internationally. |


 RSS Feed